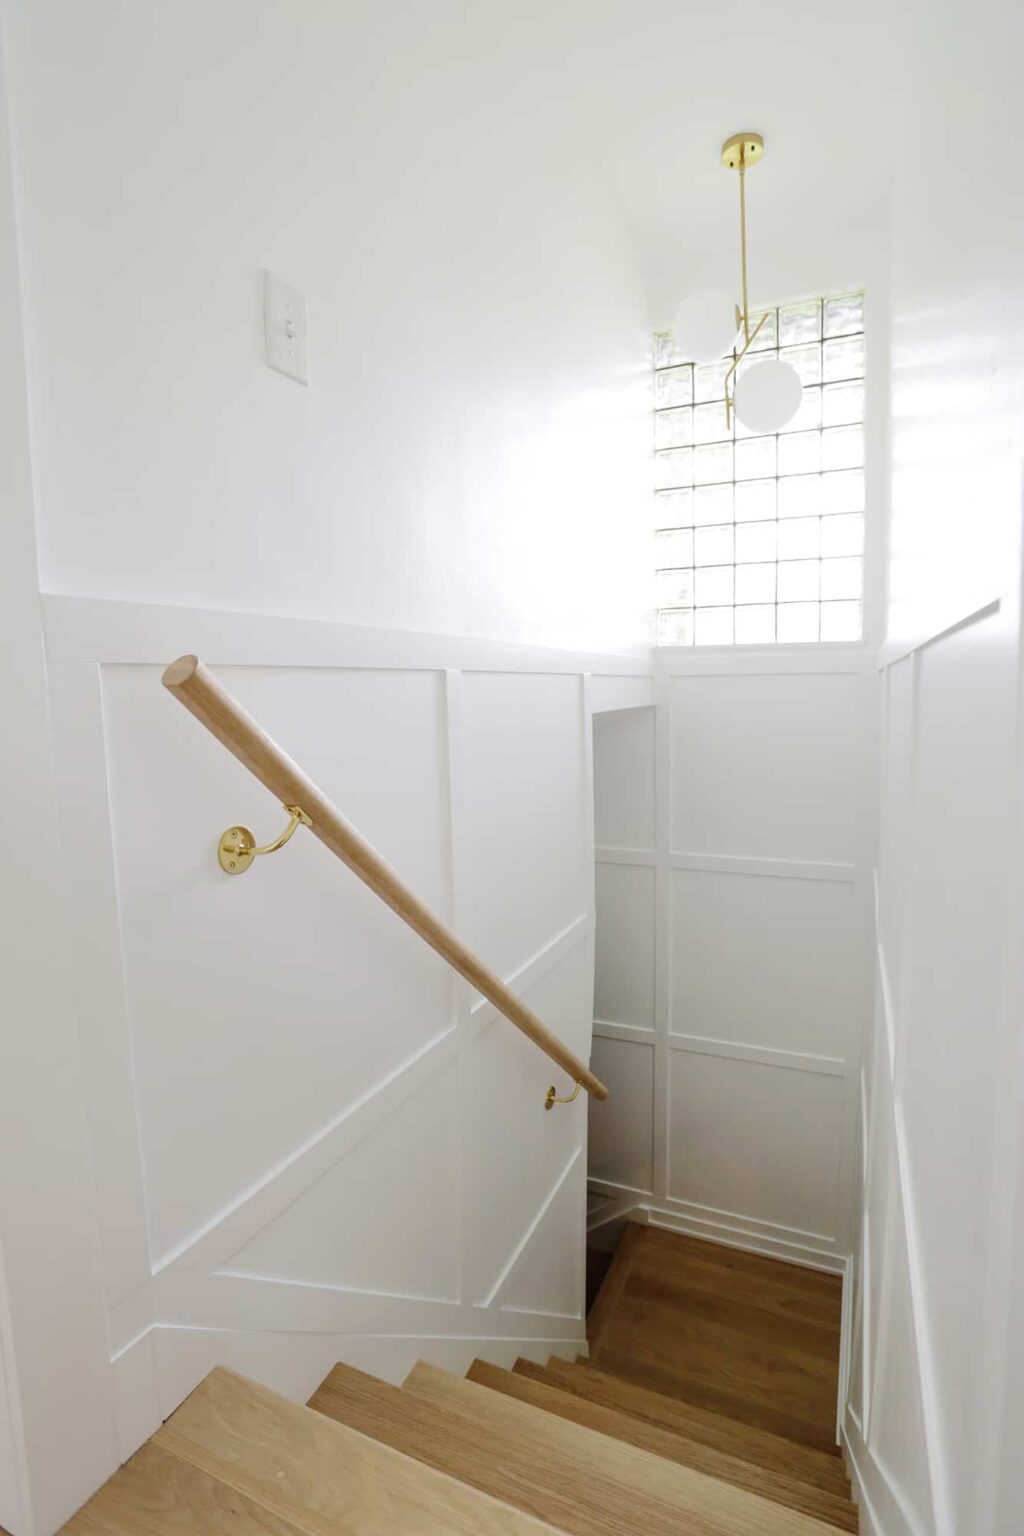
Wowie!! This is for sure one of the bigger projects I’ve taken on at our new home, but I’m absolutely in love with how it came out and how it solved a design problem for us in our small stairwell. I haven’t done a DIY board and batten project before, but I always loved it in Mandi’s bedroom, so I’ve kind of kept it in the back of my mind for a future project. Board and batten is relatively easy if you have access to a miter saw, but doing it on a staircase or stairwell area adds a little bit of a tricky component since you have the angle of the staircase to work with as well. Having said that, I’m not an expert woodworker, but my DIYer skills (and a few woodworking how-to videos!) helped me hack my way to finding all the right angles and it turned out pretty “profesh” if you ask me! Here’s how I did it!
Supplies:
–2 1/4″ trim boards (these also come in 3″ wide if you want a wider board)
–painters tape
-nail gun (I love this one but you can also rent them)
–miter saw (you can also rent those)
–wood filler and sandpaper (I like these sanding sponges as they are flexible)
-caulk and caulking gun (this is my favorite, dries fast so you can paint quickly!)
-satin paint in color of your choice (I love these brushes for painting angles and trim)
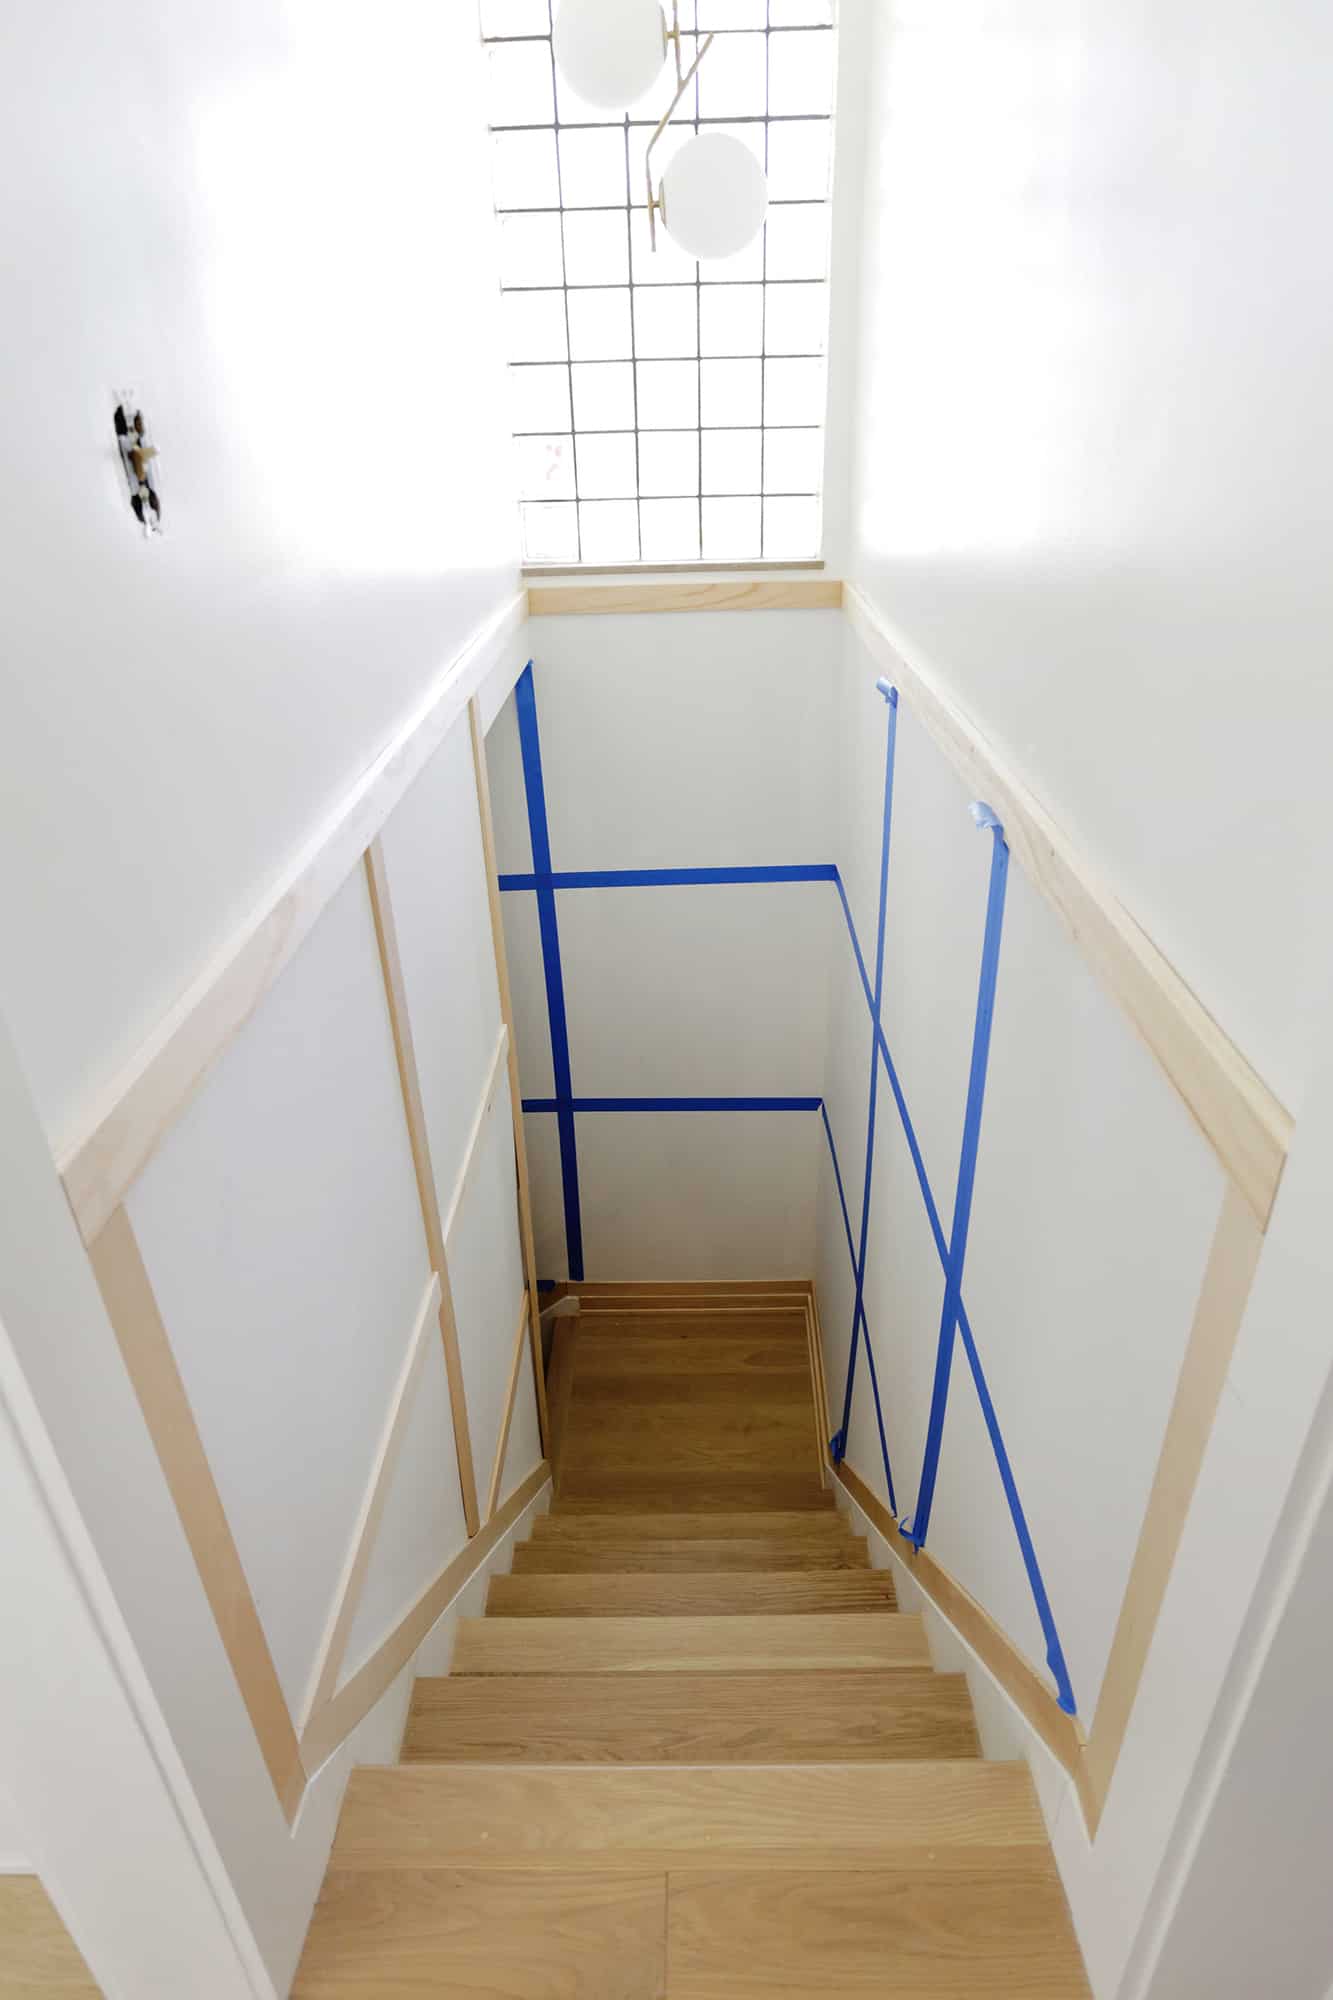
First, you’ll want to figure out your grid pattern! I used some painters tape to get an idea of where I wanted the lines to be and that’s really the easiest way to see what size grid you would like. I thought about doing just vertical boards for a more striped look, but it made the hallway feel more narrow when I taped out that option, so I decided a grid would be a better way to go. You’ll see I made the boxes even bigger than what I taped in the photo. I realized that a bigger grid would help it feel more open, so I’m glad I made that last-minute change.
When spacing out your grid, take into account the width of your boards so you are accurately spacing where each board should go. You can switch it up if you want, but generally board and batten has trim board at the top, bottom, and all the way left and right of the wall, so you are kind of dividing that space that’s left between those boards for your grid area. For example, when figuring out the vertical board placement, if your wall/area is 100″ wide, and your boards are 3″ wide each, then you need to account for one board all the way at the left side and one all the way at the right so you have 96″ of space to divide out (100″- 3″- 3″ = 96″). Then, if you decide you want 3 columns in the width of your grid, you would need to have 2 vertical boards to create that 3-column area, so you would subtract another 6″ from your remaining 96″ of free space for the width of those two boards and it would leave you with 90″ that you need to divide between your 3 columns. So, you would know that each column would need to be 30″ wide to be evenly spaced out! Just repeat that for the horizontal boards as well, subtracting the top and bottom board from the height total, deciding how many columns you want, subtracting how many boards you need for that, and dividing the open space by number of columns, and you’ll know exactly where you put your boards.
I will say that the grid system makes it easy to fudge things a bit if moving a board a little here and there is better for your overall design. I moved a few boards when I realized that they were really close to meeting up at a spot on the stairs or wall that looked better overall, and you really can’t tell if one area is slightly bigger/smaller than another, so I say go for it if you want to move things a little as you go.
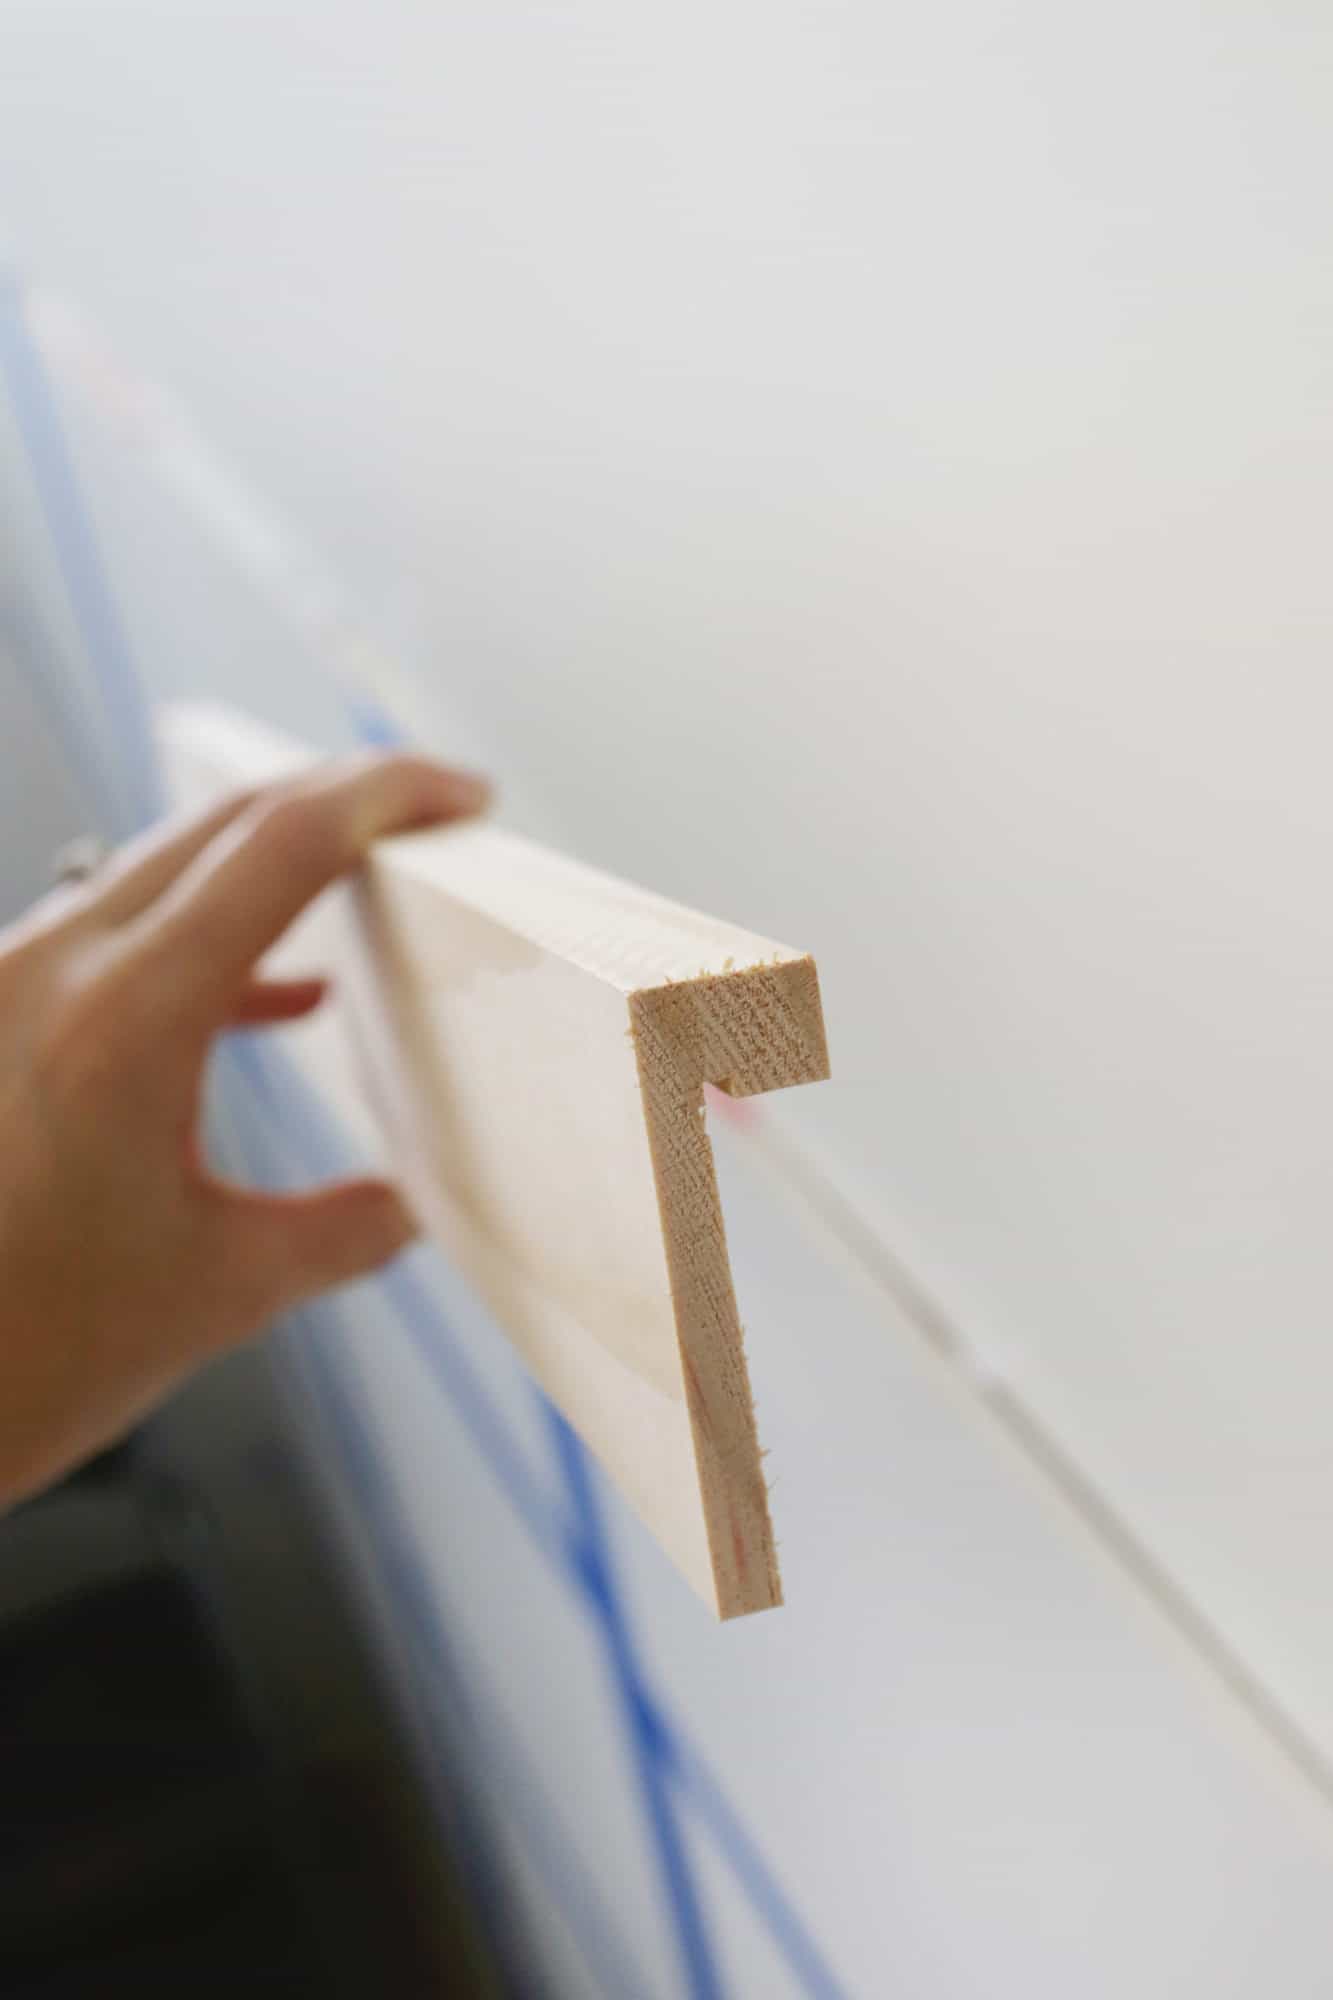
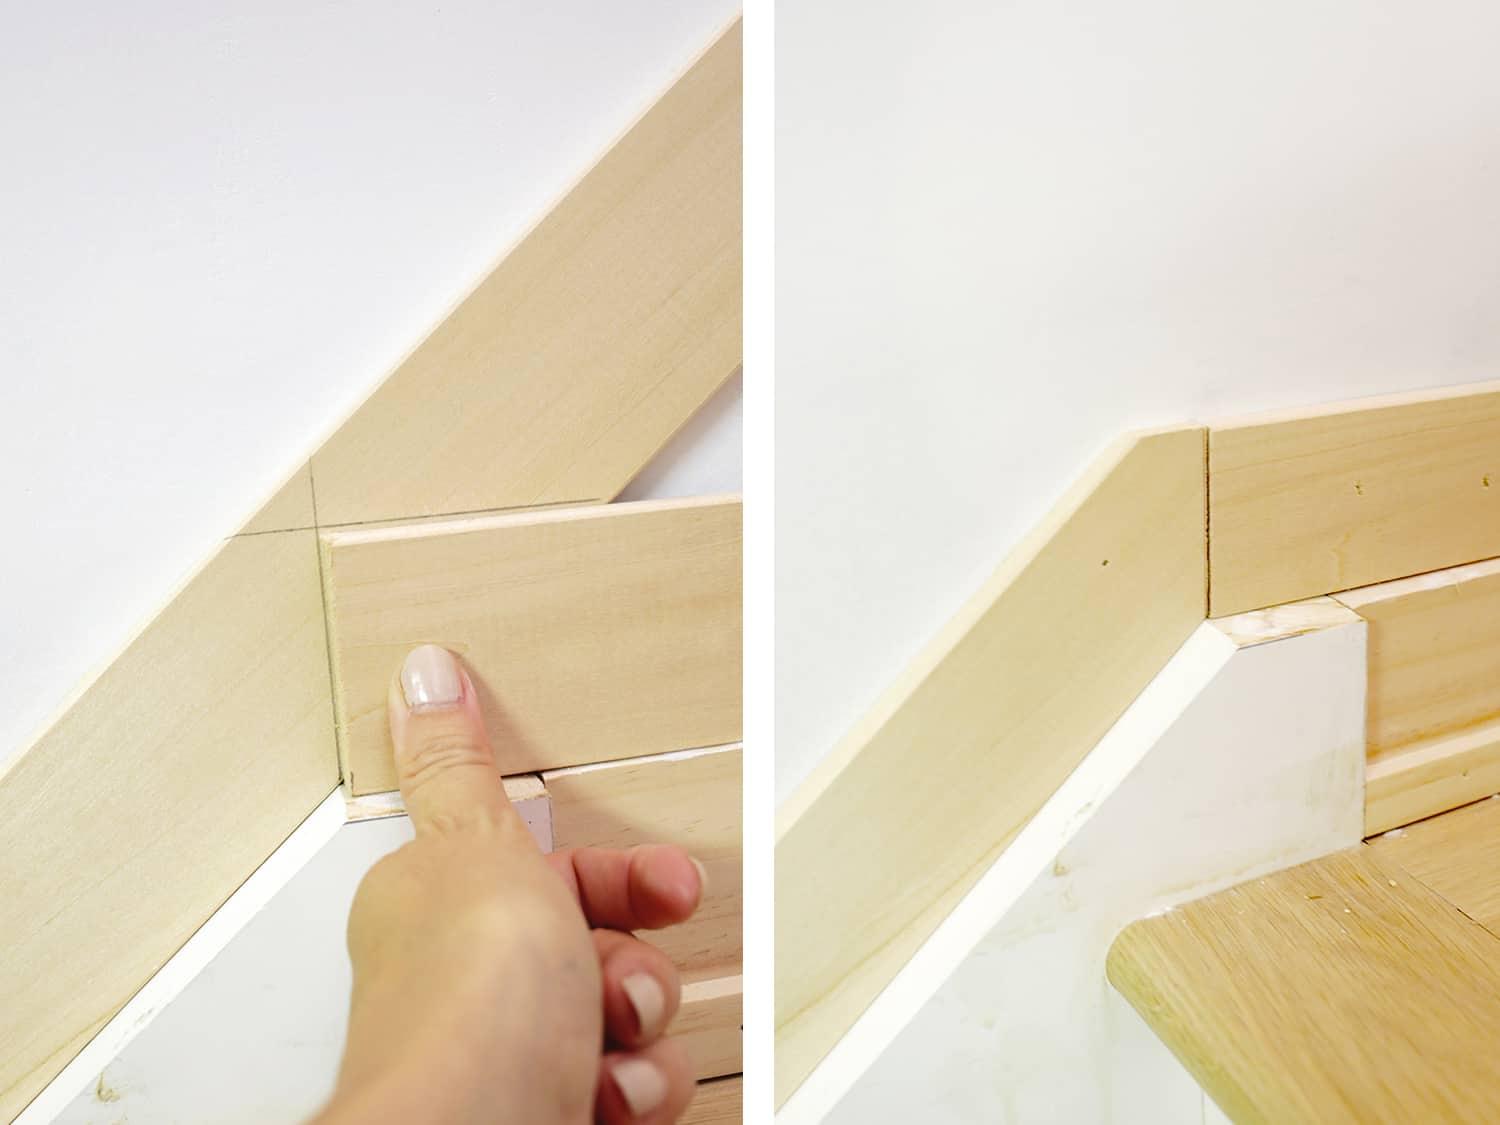
You can see that we have a bit of a special problem here in our stairwell … originally the wall goes from cinder block on the bottom to plaster on the top with some floor joists in between and we wanted to drywall over the cinder block to make it all smooth. We had our contractor put in some drywall over the cinder block and joists so we’d have a good starting point, but I still had the problem of the new drywall sticking out 3/4″ further than the upper plaster wall. Because of that, rather than just placing a 1/4″ thick top board on the wall as the top railing like you normally would with a regular smooth wall, I had to get a 1″ thick board and rabbet cut a 3/4″ wide notch on my table saw (a new trick for me to learn which was kind of cool!) so that the top board would sit like a puzzle piece flush against the top plaster wall and the drywall below it, making a smooth transition from one surface to another (I cut the corners at a 45° angle so they fit together when they met there). It worked really well, but I bet most of you won’t have that problem, so you can just use your 1/4″ board all along the top like all the other boards.
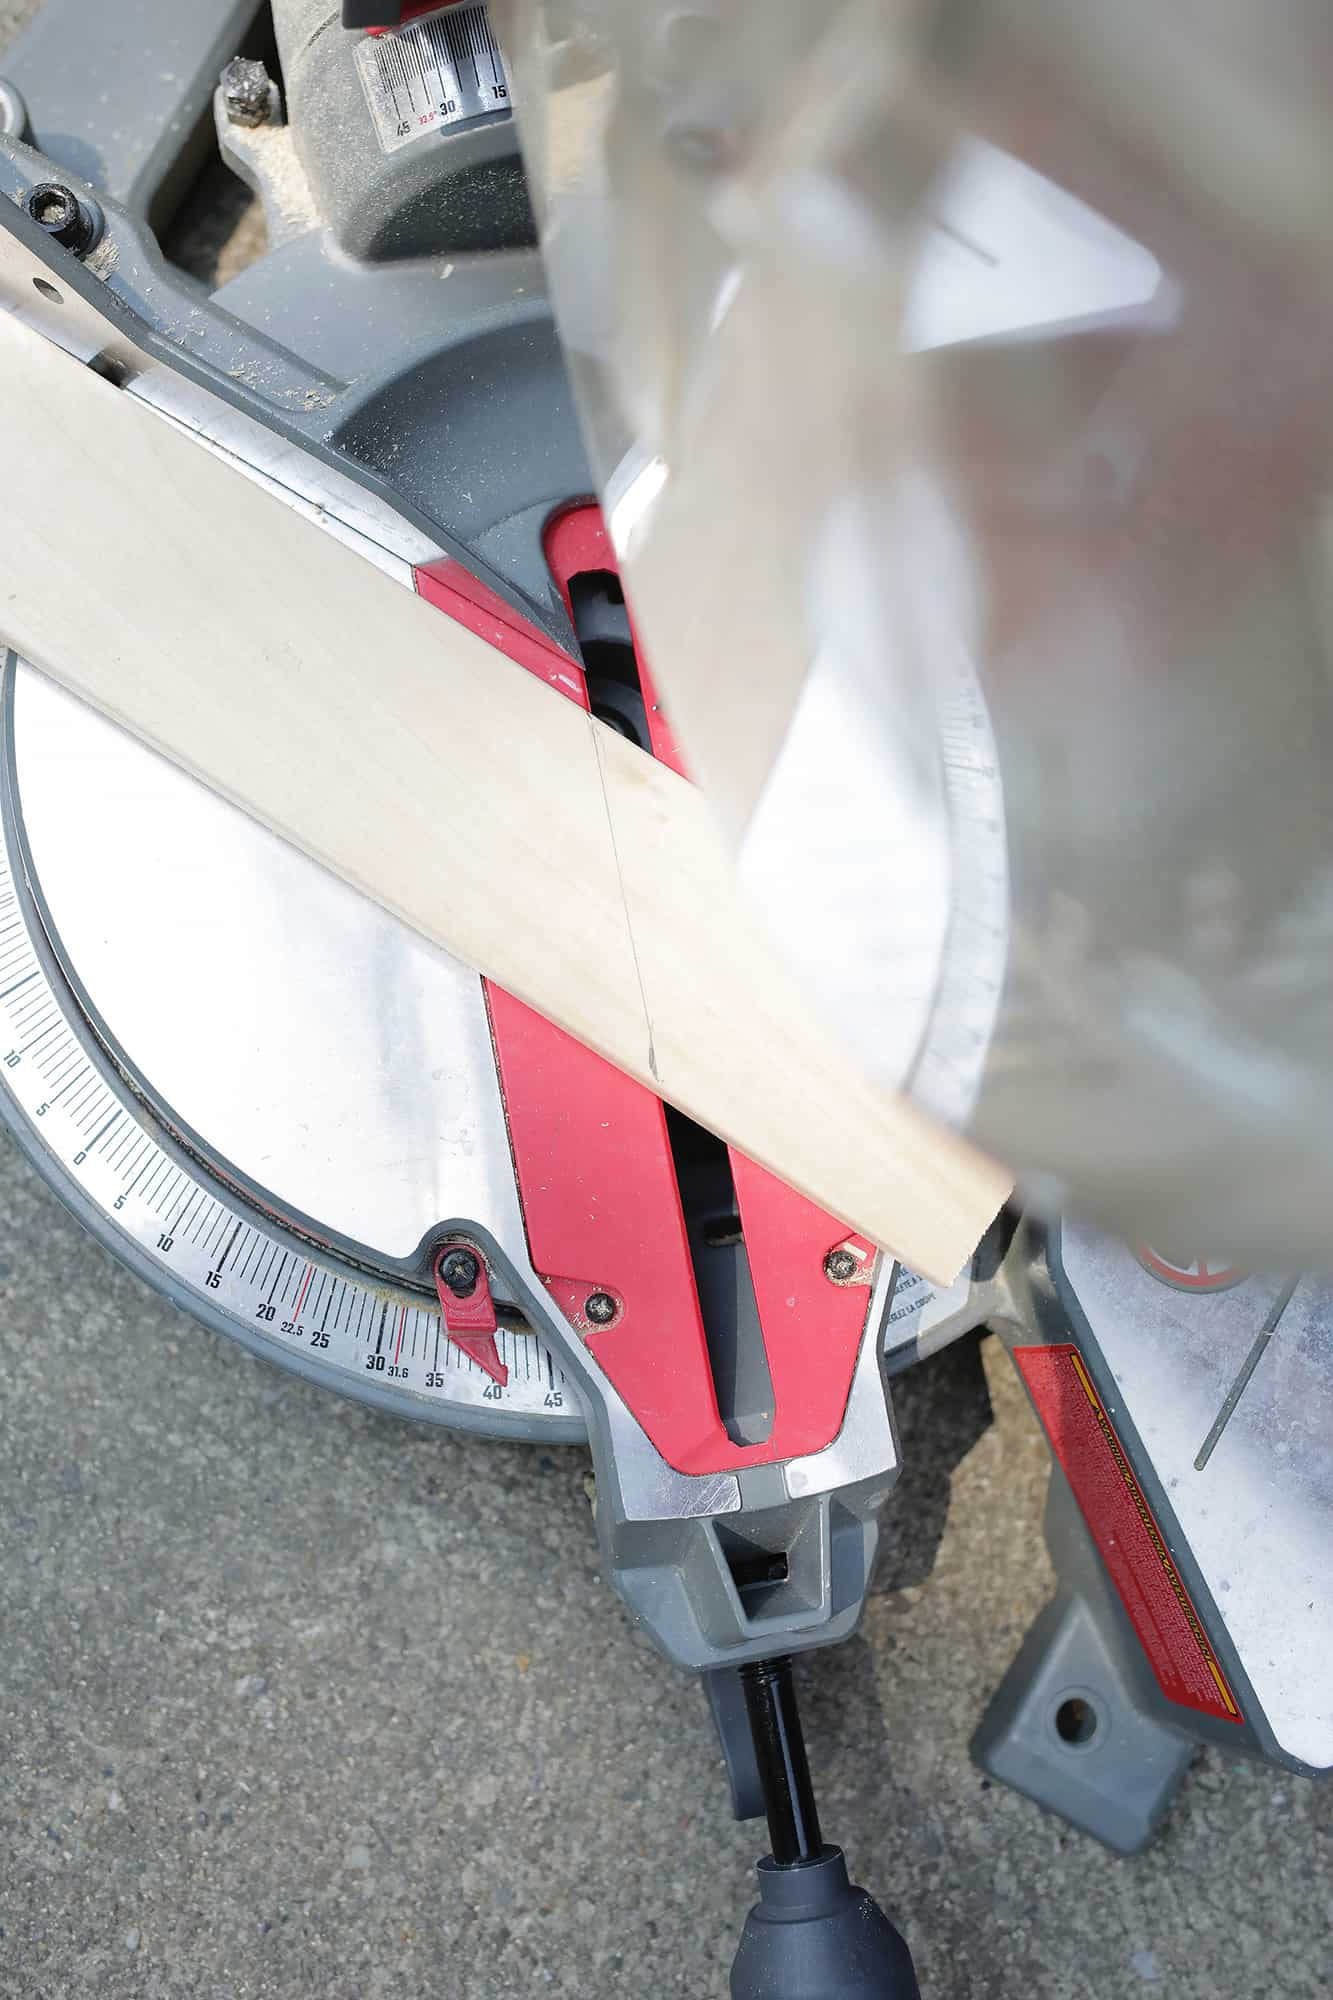
Once the top board was in, I set about cutting my 1/4″ boards to line the bottom of my stairwell area. You can see that it’s a lot of angle finding on the bottom of the stair area, so what I would do is hold boards in place basically drawing with a pencil where it looked like the angles should be, and then I would take the board to my miter saw and move the blade angle until it matched the line of my pencil drawing (you can line it up with the side of the opening for an easy way to tell if you have the right angle).
It can be a lot of cutting and checking, cutting a little more and rechecking, but when it’s all done it will be totally worth it! Just remember, you always want to cut things a little too long if you are unsure since you can cut off a little more if you need to. But it’s a pain to cut a totally new board or join it to a tiny section if you cut it too short, so keep that in mind. You’ll be filling all the joints where they come together with wood filler later, so if the angle is a little off where they join up but can be filled to look smooth, then just let the wood filler do its job if you don’t want to recut the board.
Use a nail gun (I’m in love with our battery powered one, but you can also rent them!) to attach the boards to the wall as you get them cut to the right angle and length, and I would give the cut edges a little sanding before attaching to sand off the little fuzzy edges from the saw.
Pay attention to how the bottom boards turn down a corner and have that little “shelf” area on the one board as it turns to go down or turns to go straight again. That keeps it the width of the board the same the whole way down, so make sure you are adding that little cut into your boards when you go down an angle.
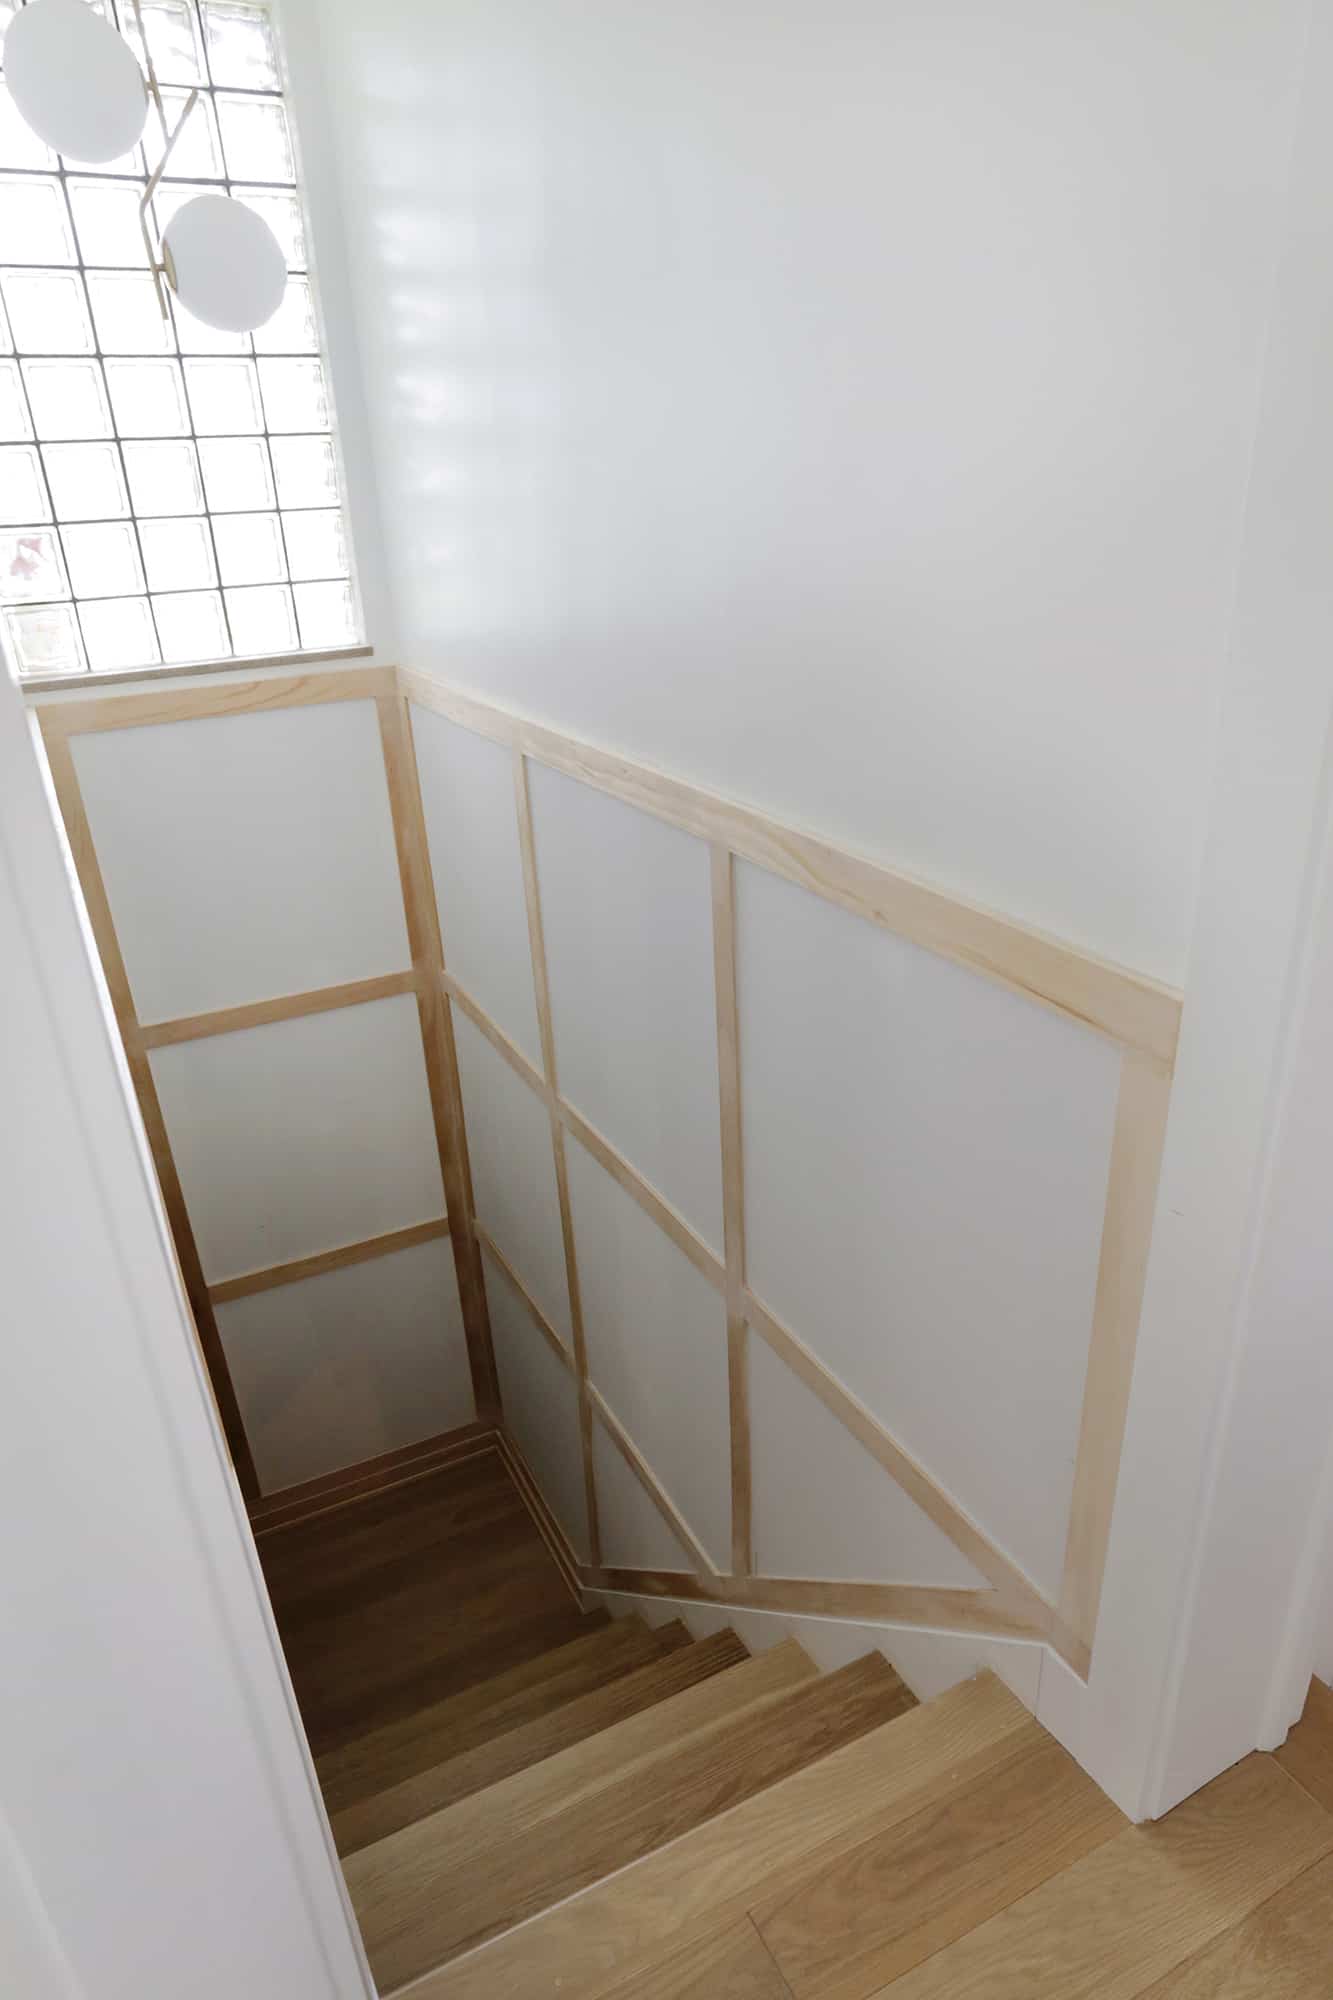
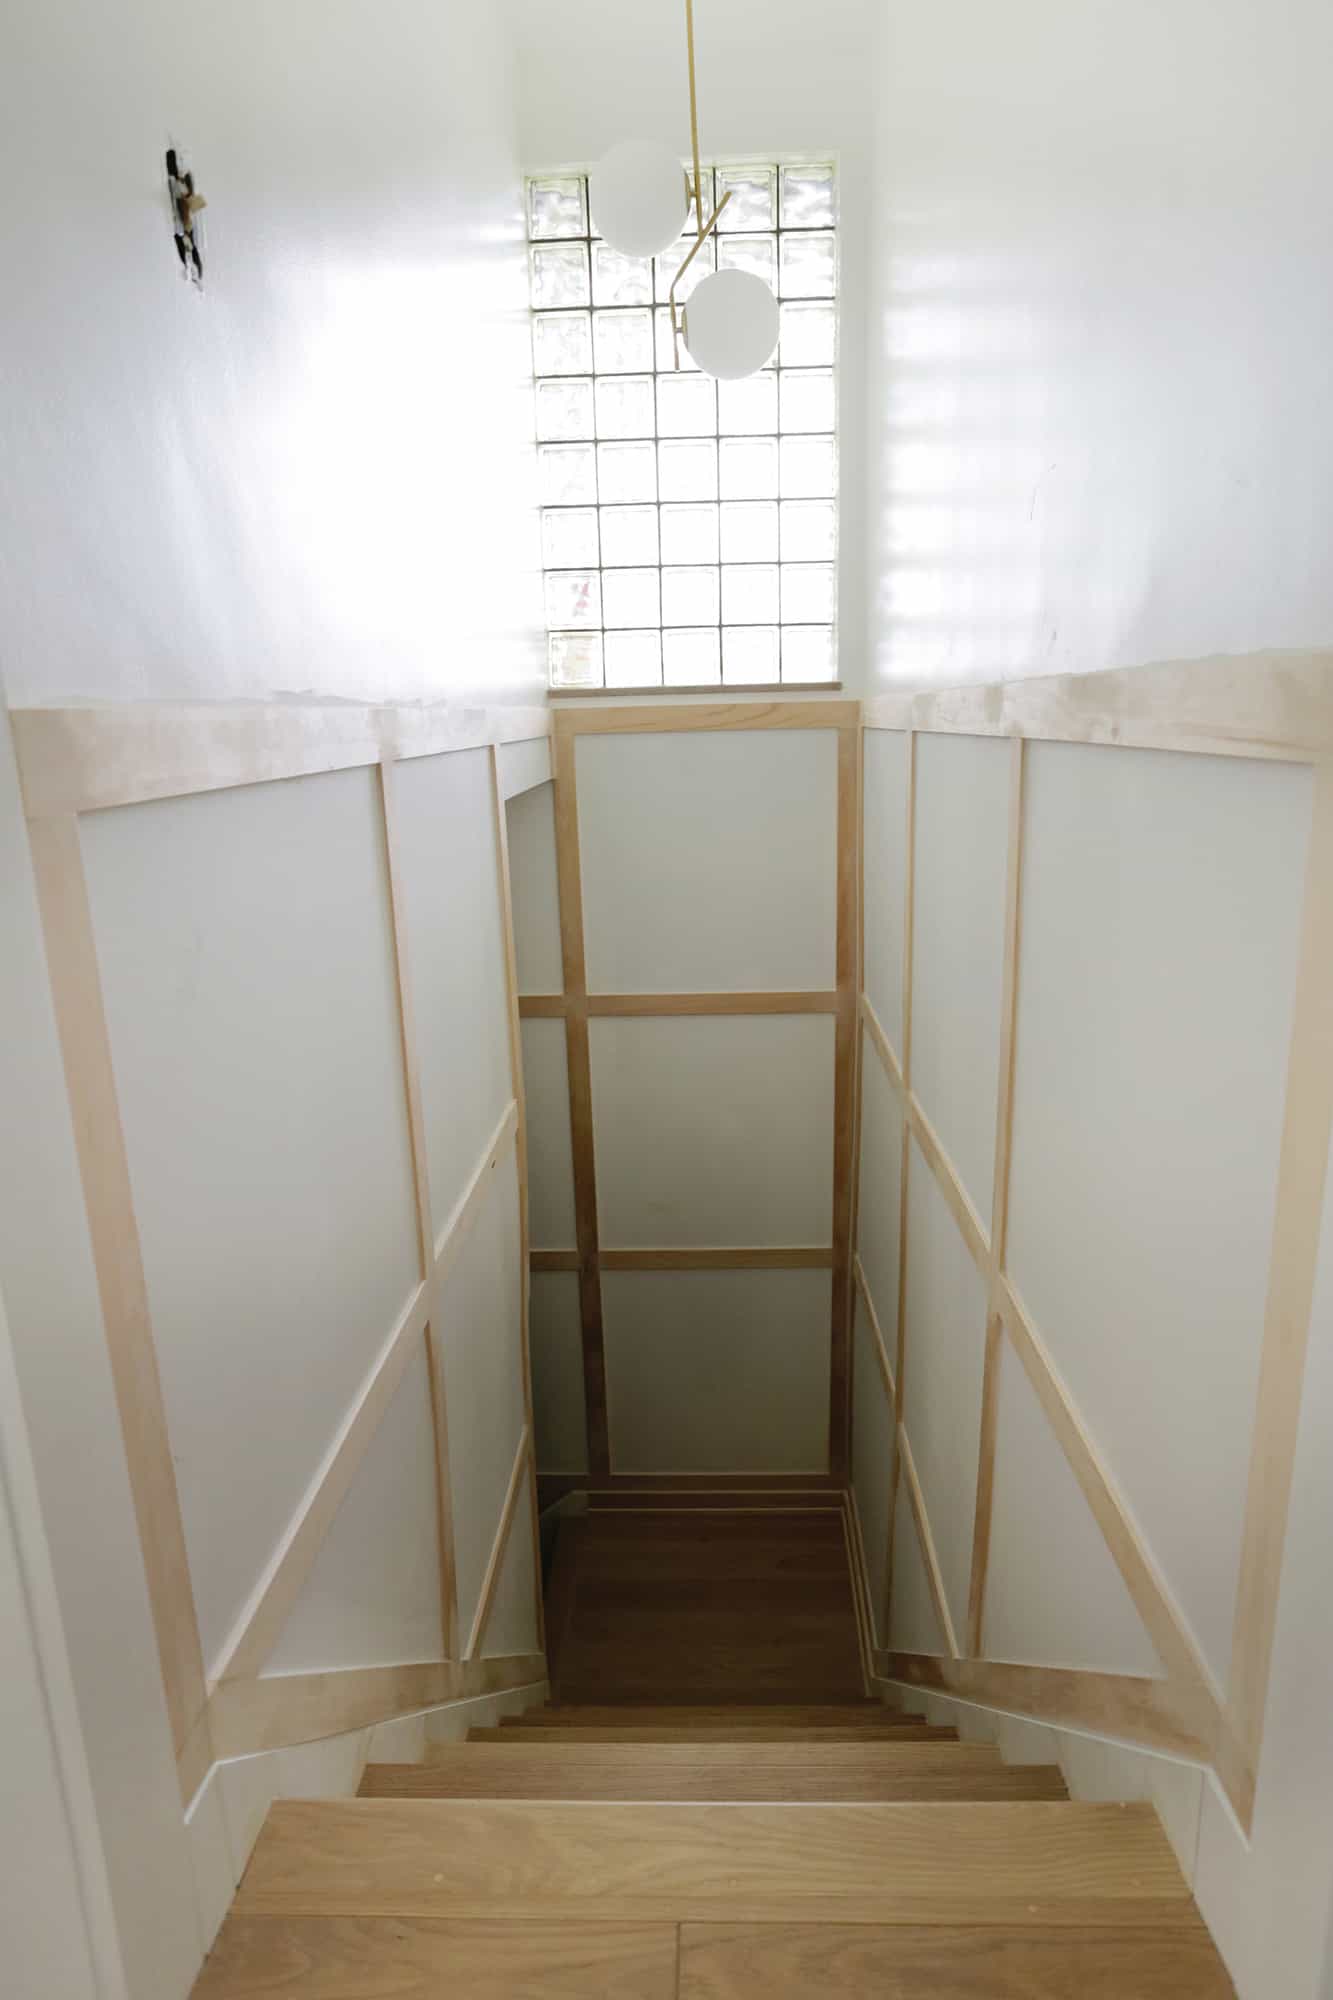 Once you get all your bottom boards in (yay!) you can start on the vertical boards! Measure, cut, and attach with your nail gun all your vertical boards, finding any angles the way we did with the bottom boards (i.e., hold it up to the angle, guess the angle with a pencil line, cut and see if the angle fits, recut a little more if needed). You can also use a scrap board to find the angles if you don’t want to cut your “real” board, and just make note of which angle was the winner for your real cut. I found that a lot of 40° and 43° angles were needed for mine, but your staircase may be a different slope, etc.
Corners are generally two vertical boards coming together to meet in the corner, and if your corners aren’t a perfect 45° you may need to attach one board as close to the corner as you can (level it to make sure it’s straight) and then scribe the side that will fit in the corner of the second vertical board with a jigsaw to fit perfectly against that first board (here’s a good video that shows how to find and trace a wonky wall line for a good fit). That was how I did the two boards in the back right hand corner … I put the right side board on first, making sure it was straight and as close to the corner as possible, and then I scribed the right inside edge of the board on the left to fit against the other board perfectly.
Once the vertical boards are in, it’s time for the horizontal ones! These go the fastest as you have some angles to find, but a lot of them are between columns so they are just straight cuts and a lot faster (you can just measure the space between the vertical boards and cut to fit).
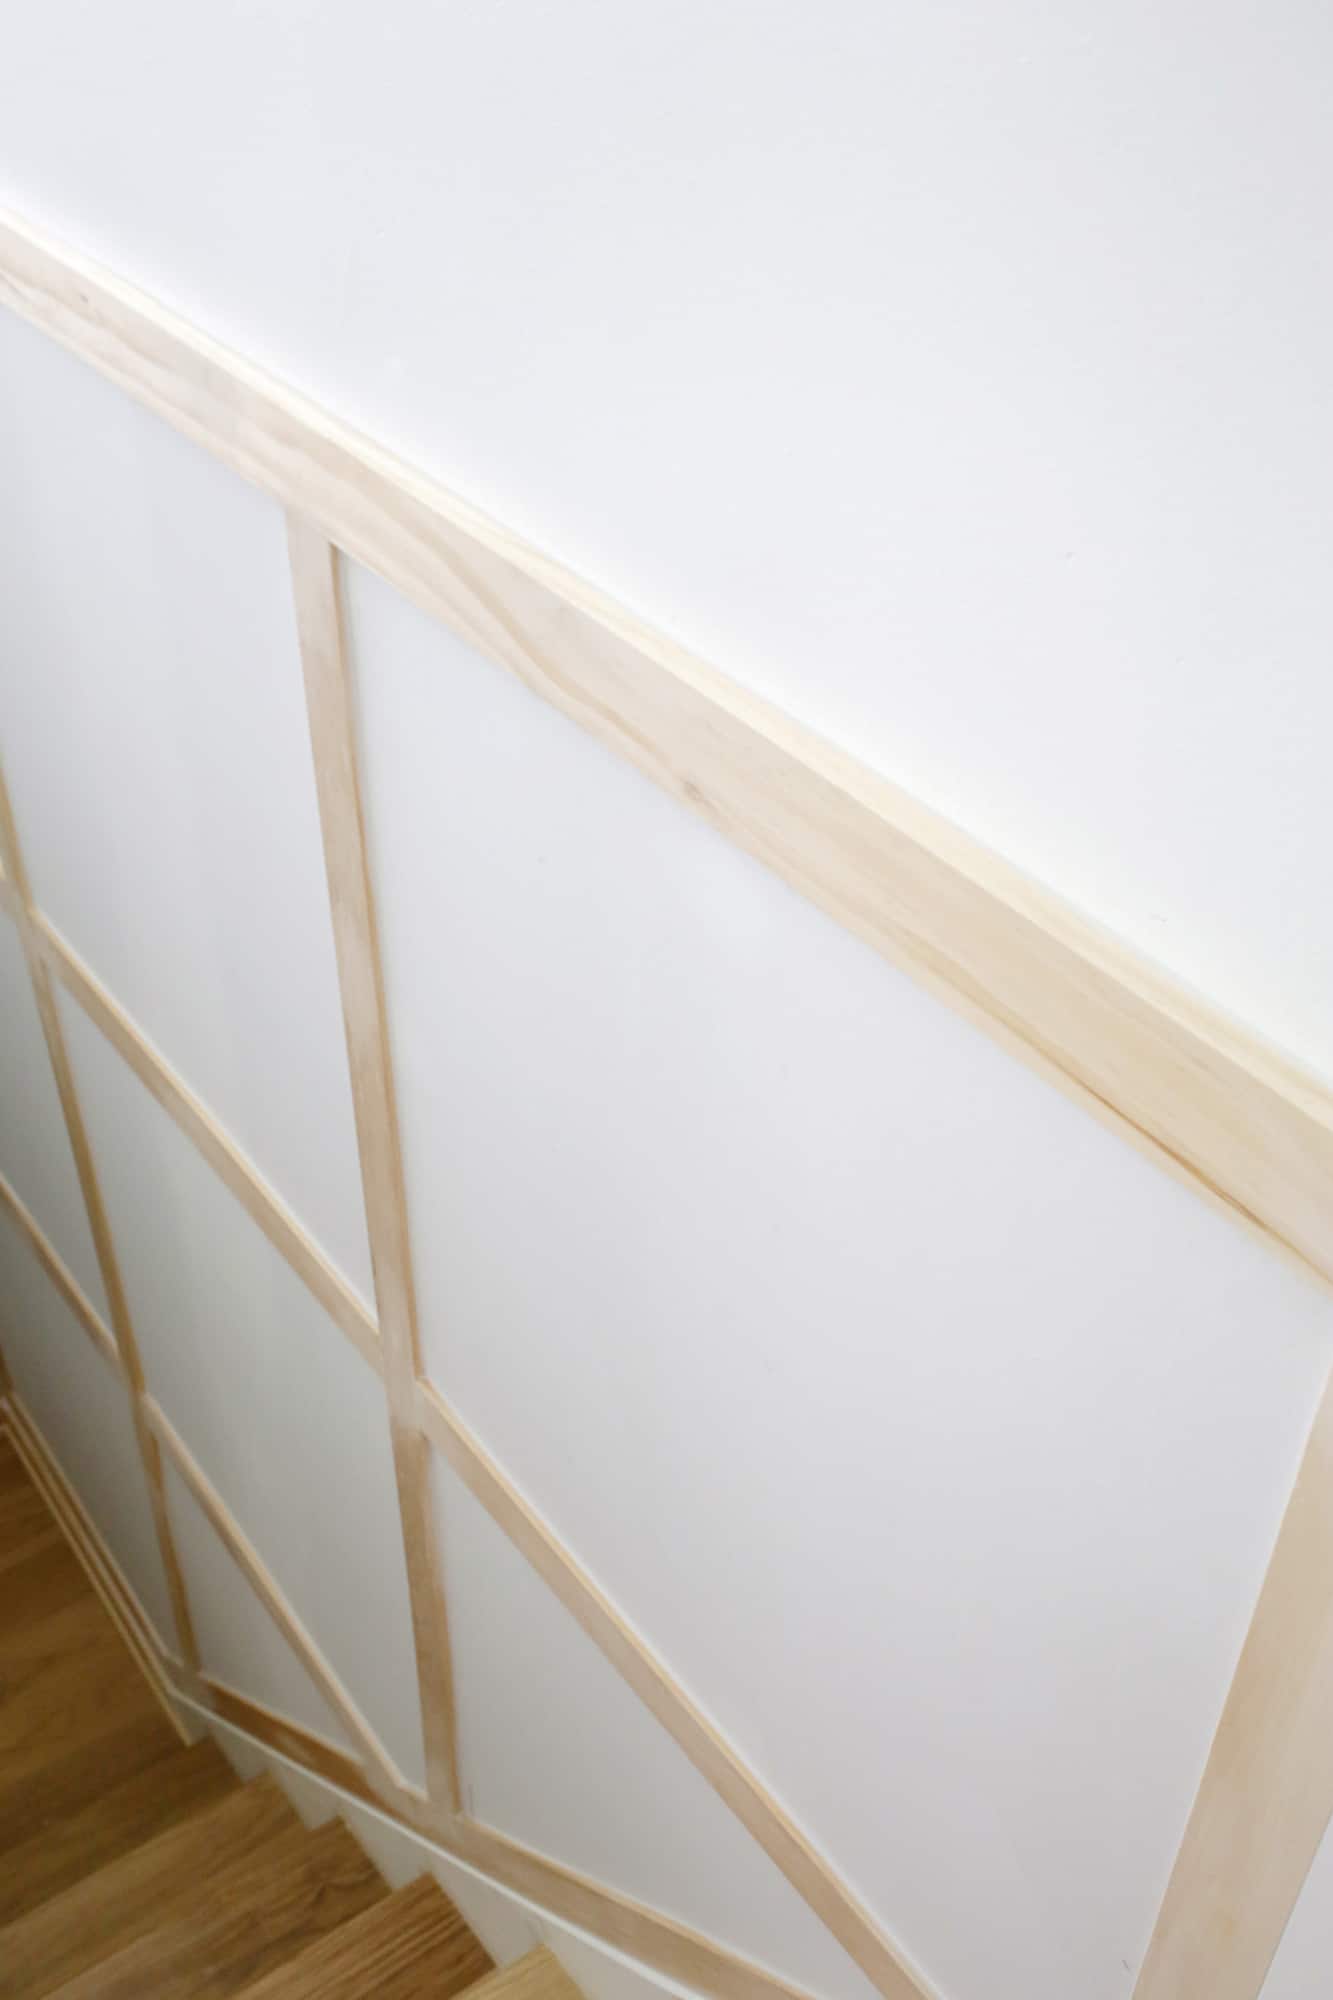 You did it! That’s really the hardest part and the rest is finish work. Fill the nail holes and gaps where board joints meet together with wood filler to smooth out all the joints. A little tip for less sanding is to let the filler set a bit and then gently go over it with a damp cloth—it will smooth out the filler and wipe away excess so you have less sanding to do later.
Once the filler is dry, sand it down smooth. Then, caulk all around the squares between the boards and the drywall to make it look integrated and not separate from the wall. Just cut the tip at an angle with a small opening, use a thin bead of it, and smooth it out with a damp finger or cloth. It’s a bit time consuming to do, but it makes a HUGE difference.
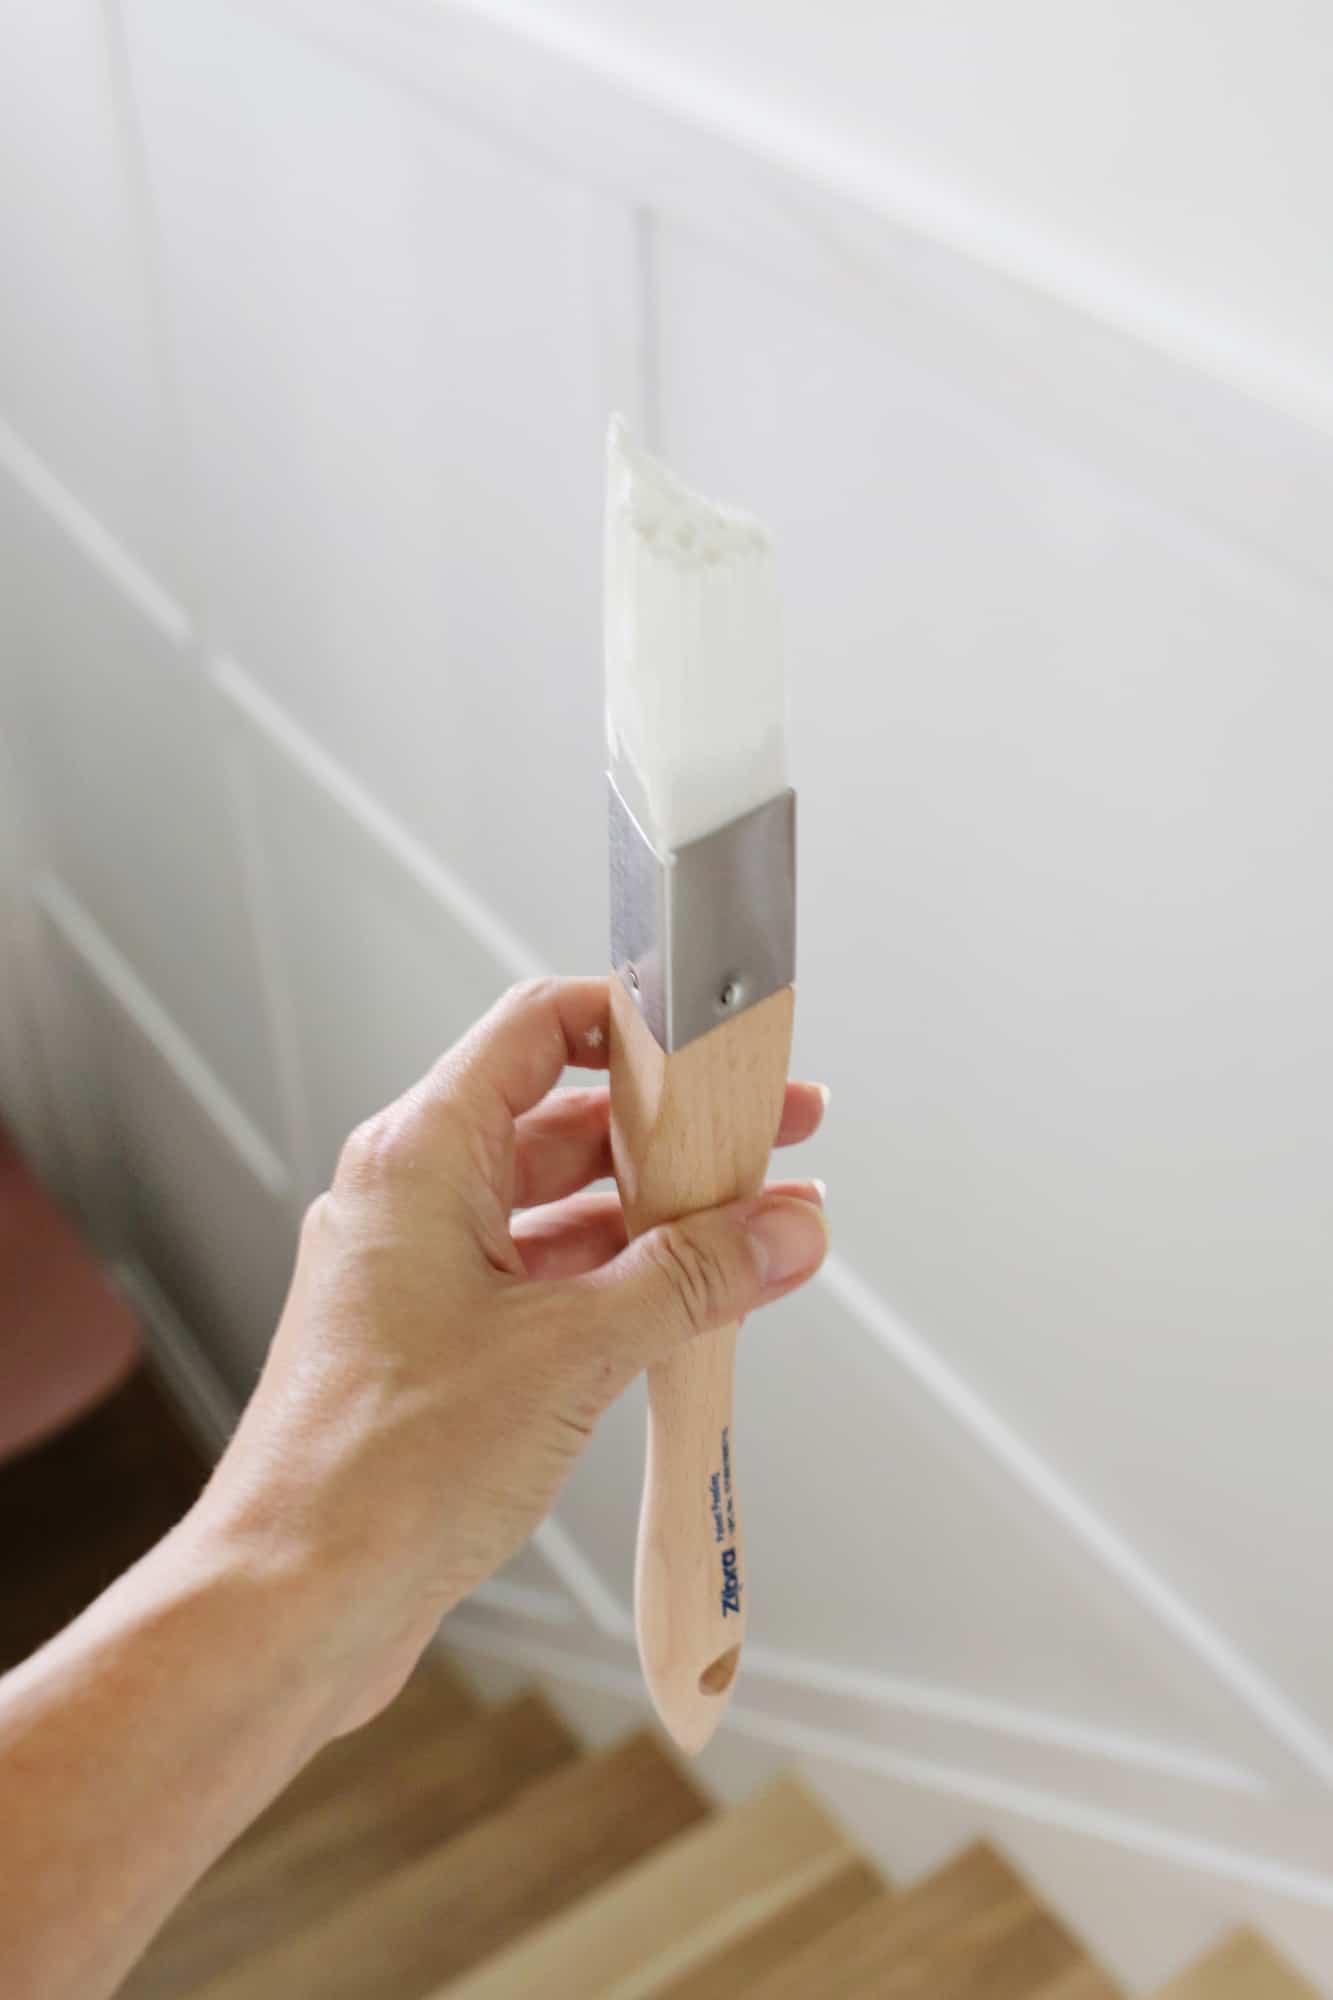
Once your filling and caulking is complete, it’s time to paint! I love this brush for painting angled trim like this and then a small roller for painting the insides of the squares and the flat faces of the trim for a smooth look. It’s up to you what paint to use, but I would suggest a satin finish as it’s more of a wall than trim and generally you use satin on a wall and semi-gloss on trim (eggshell could work but the whole thing in semi-gloss could look too shiny).

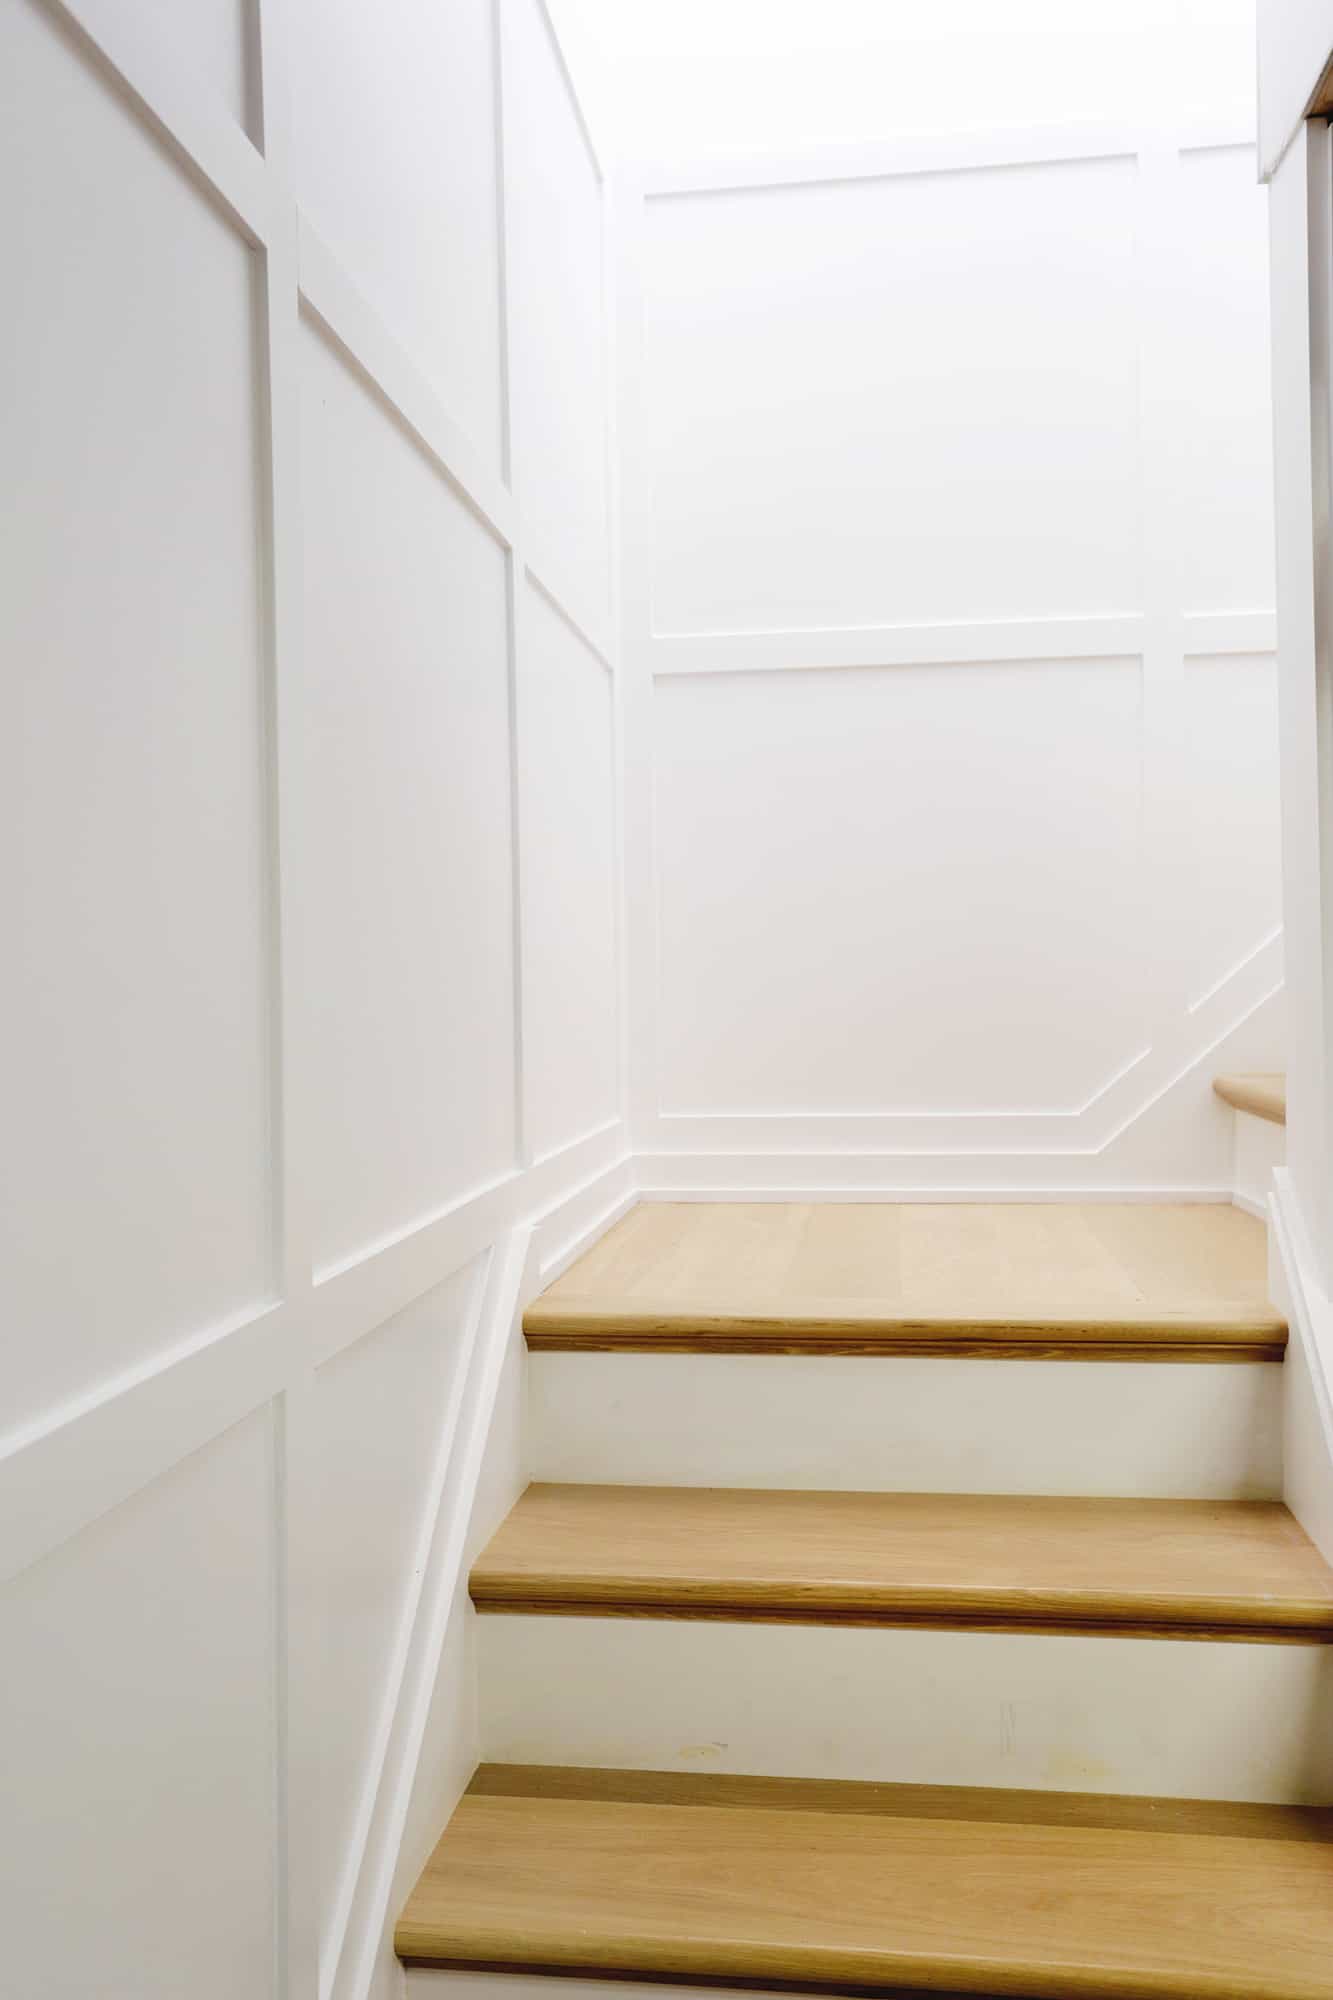
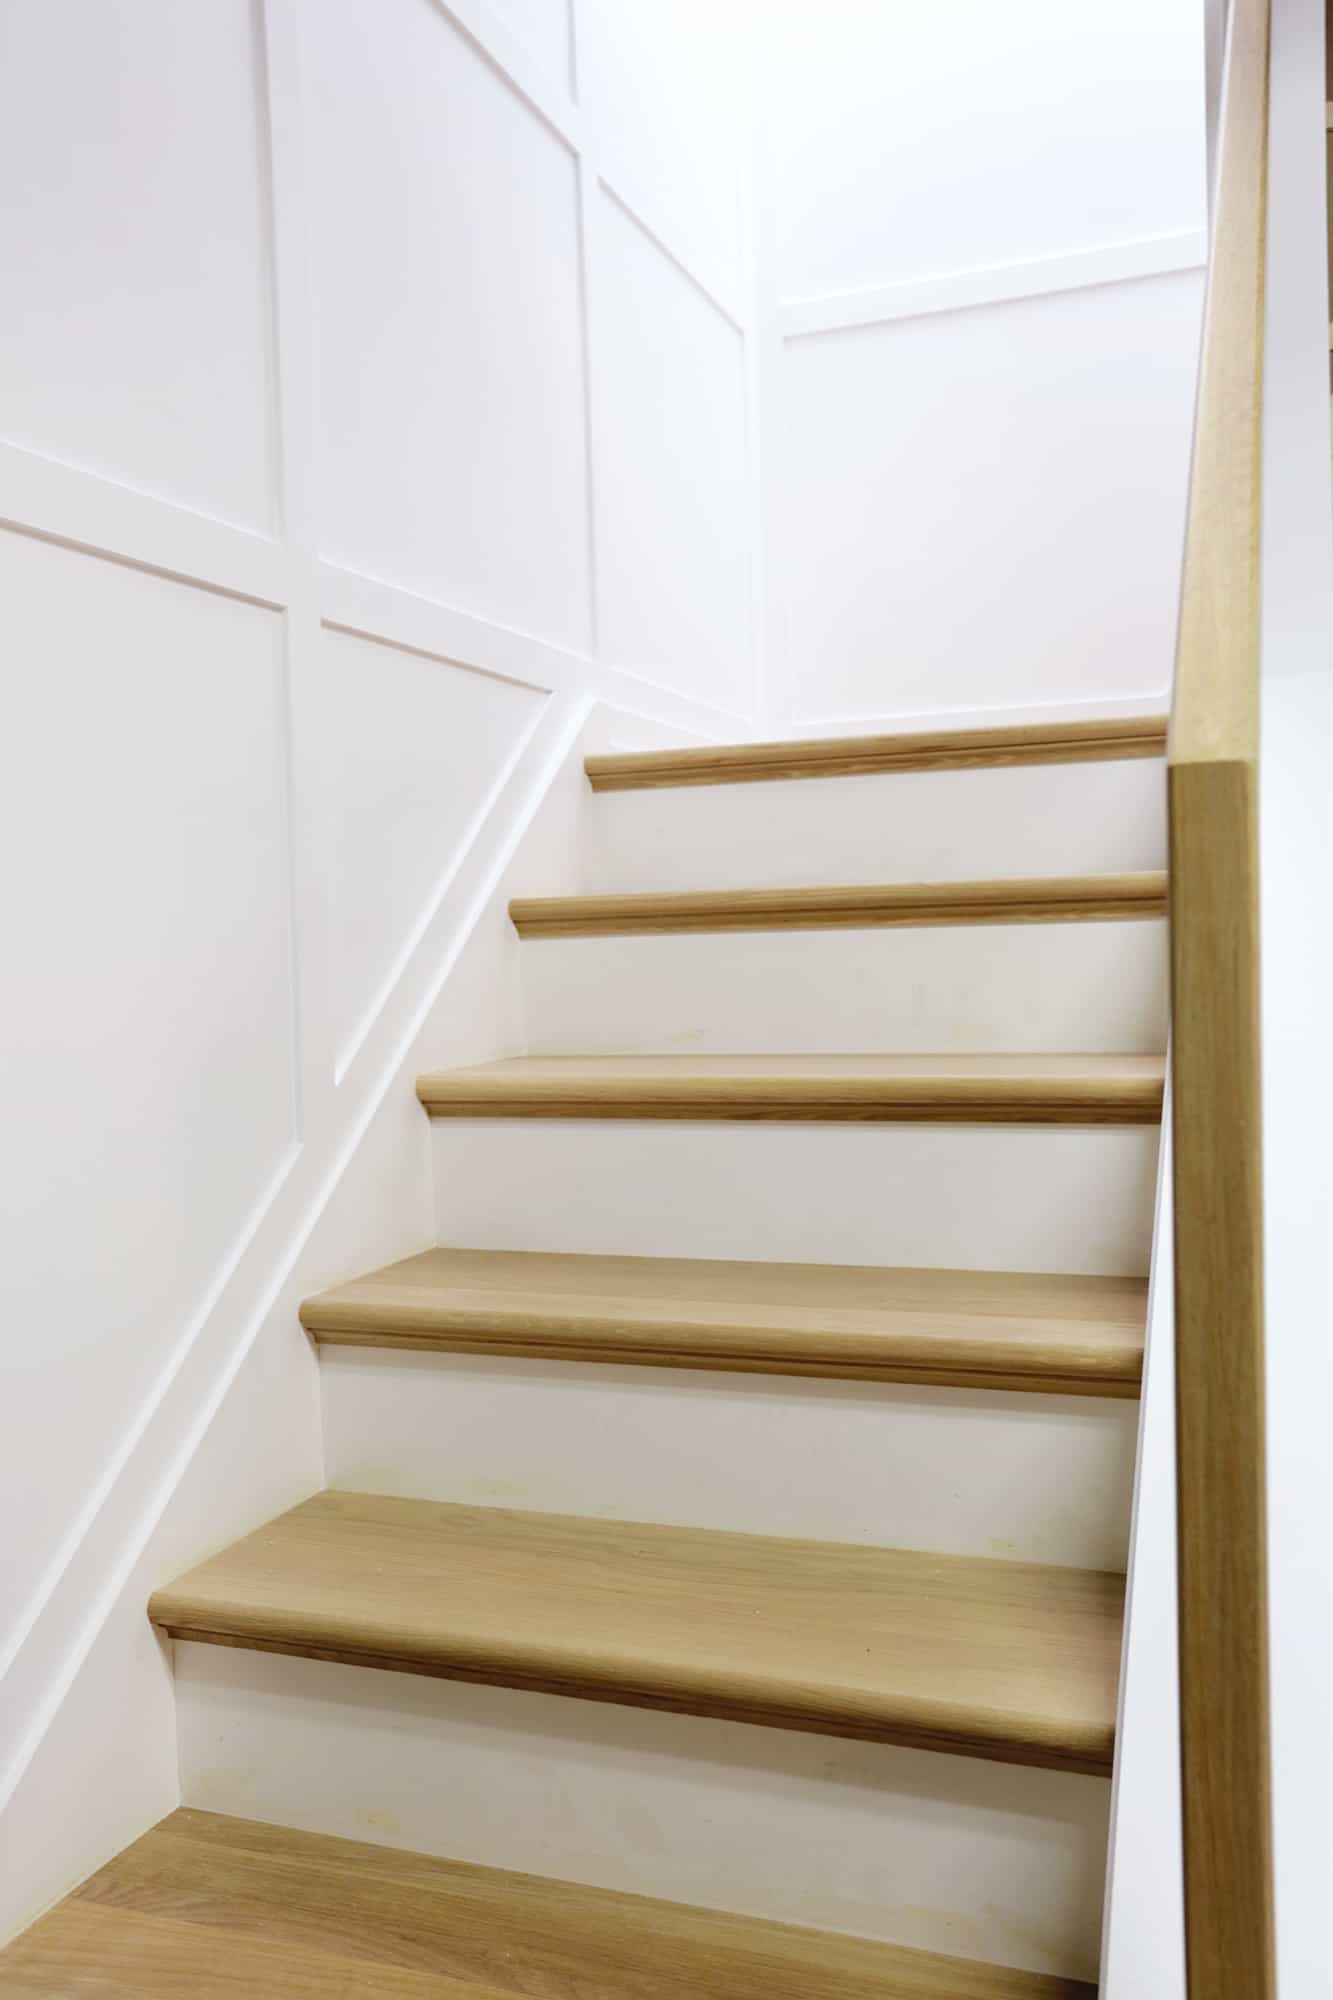

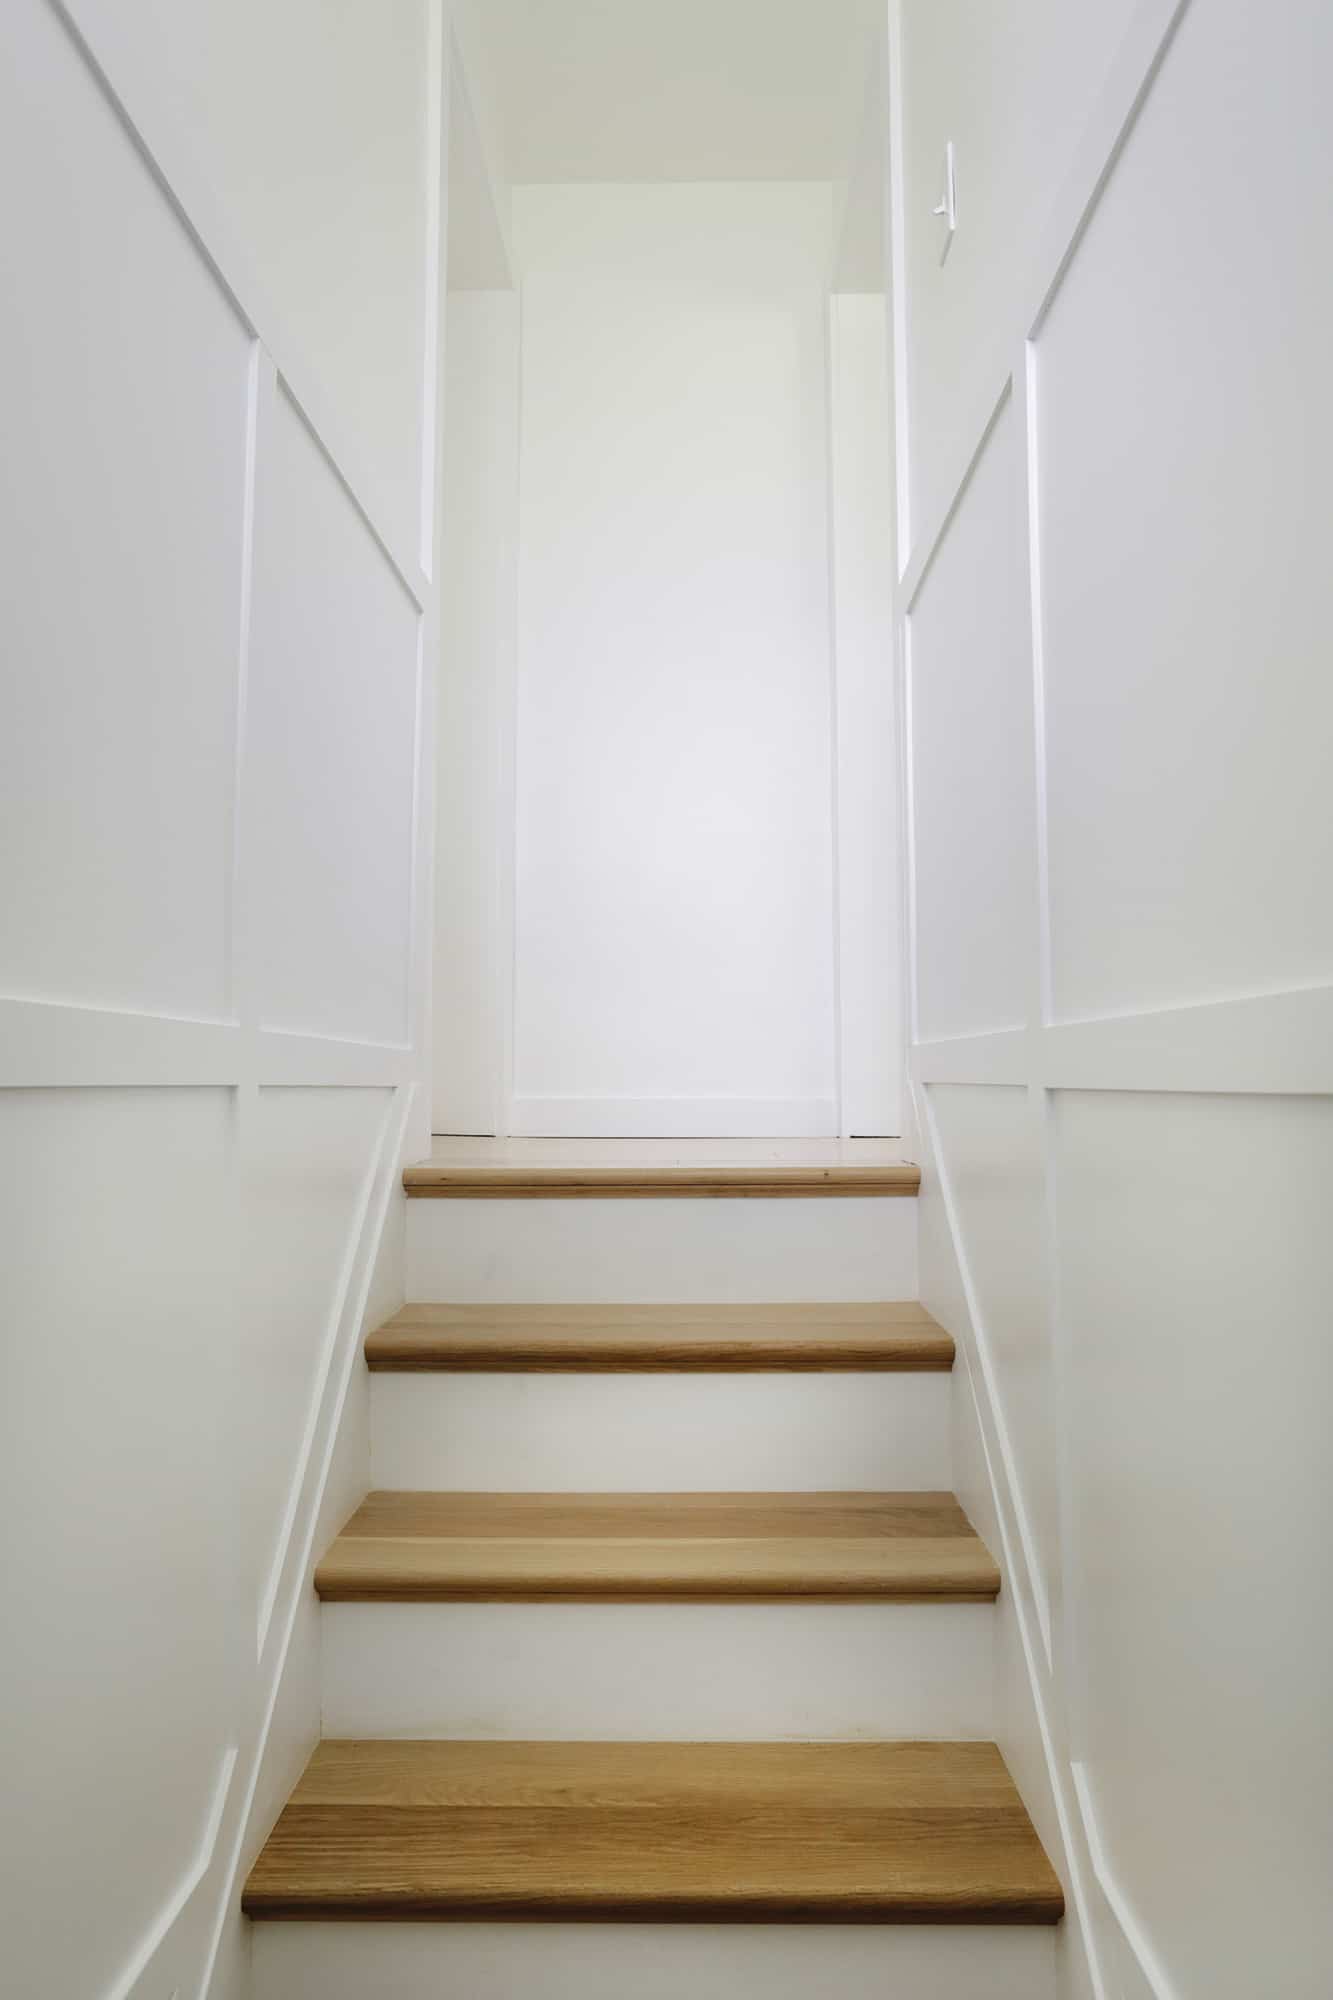
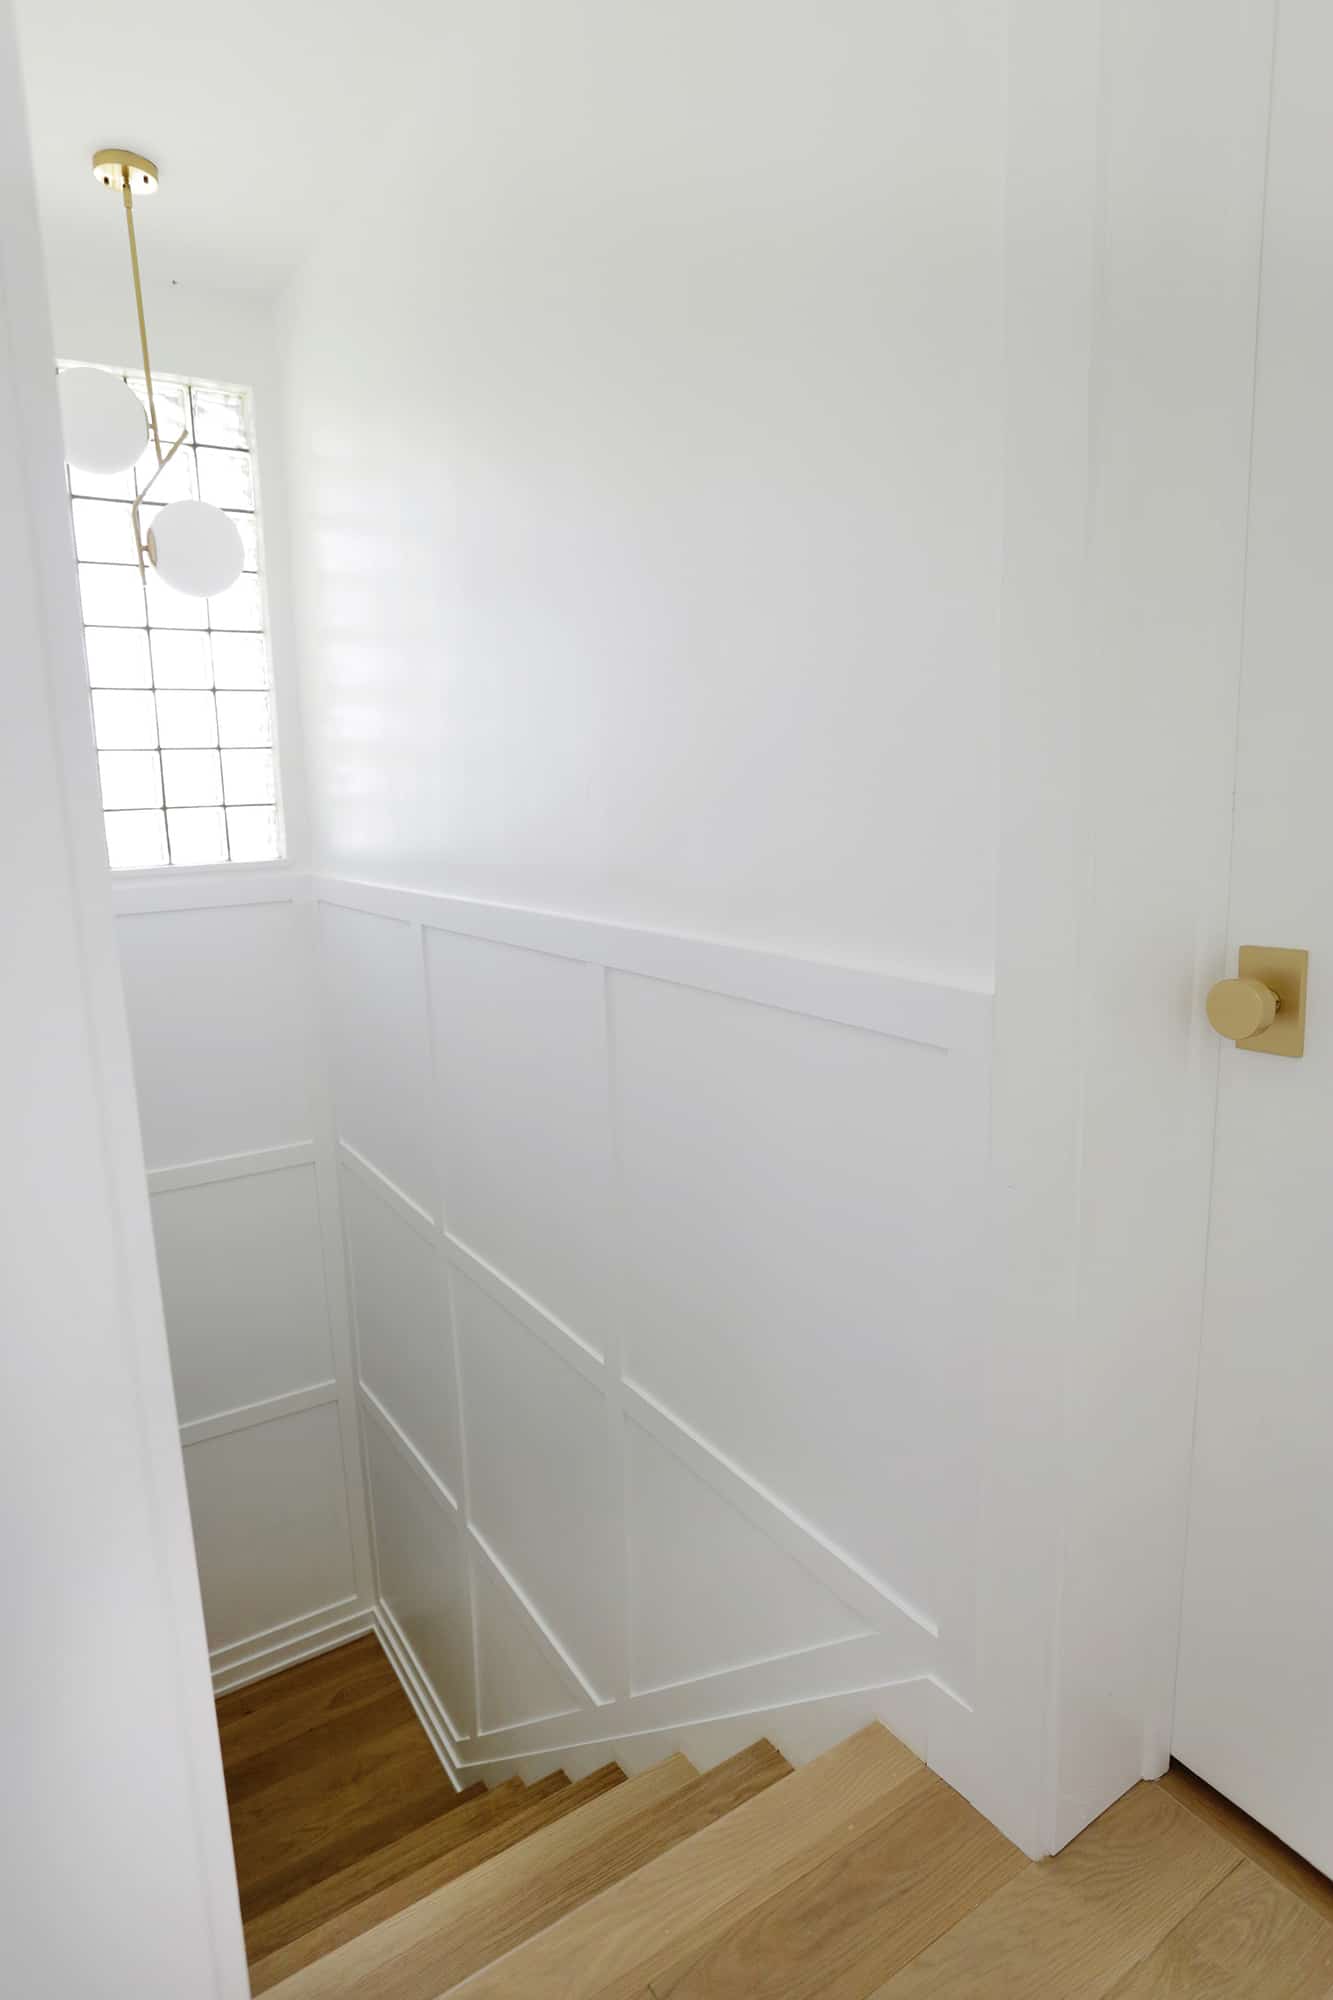
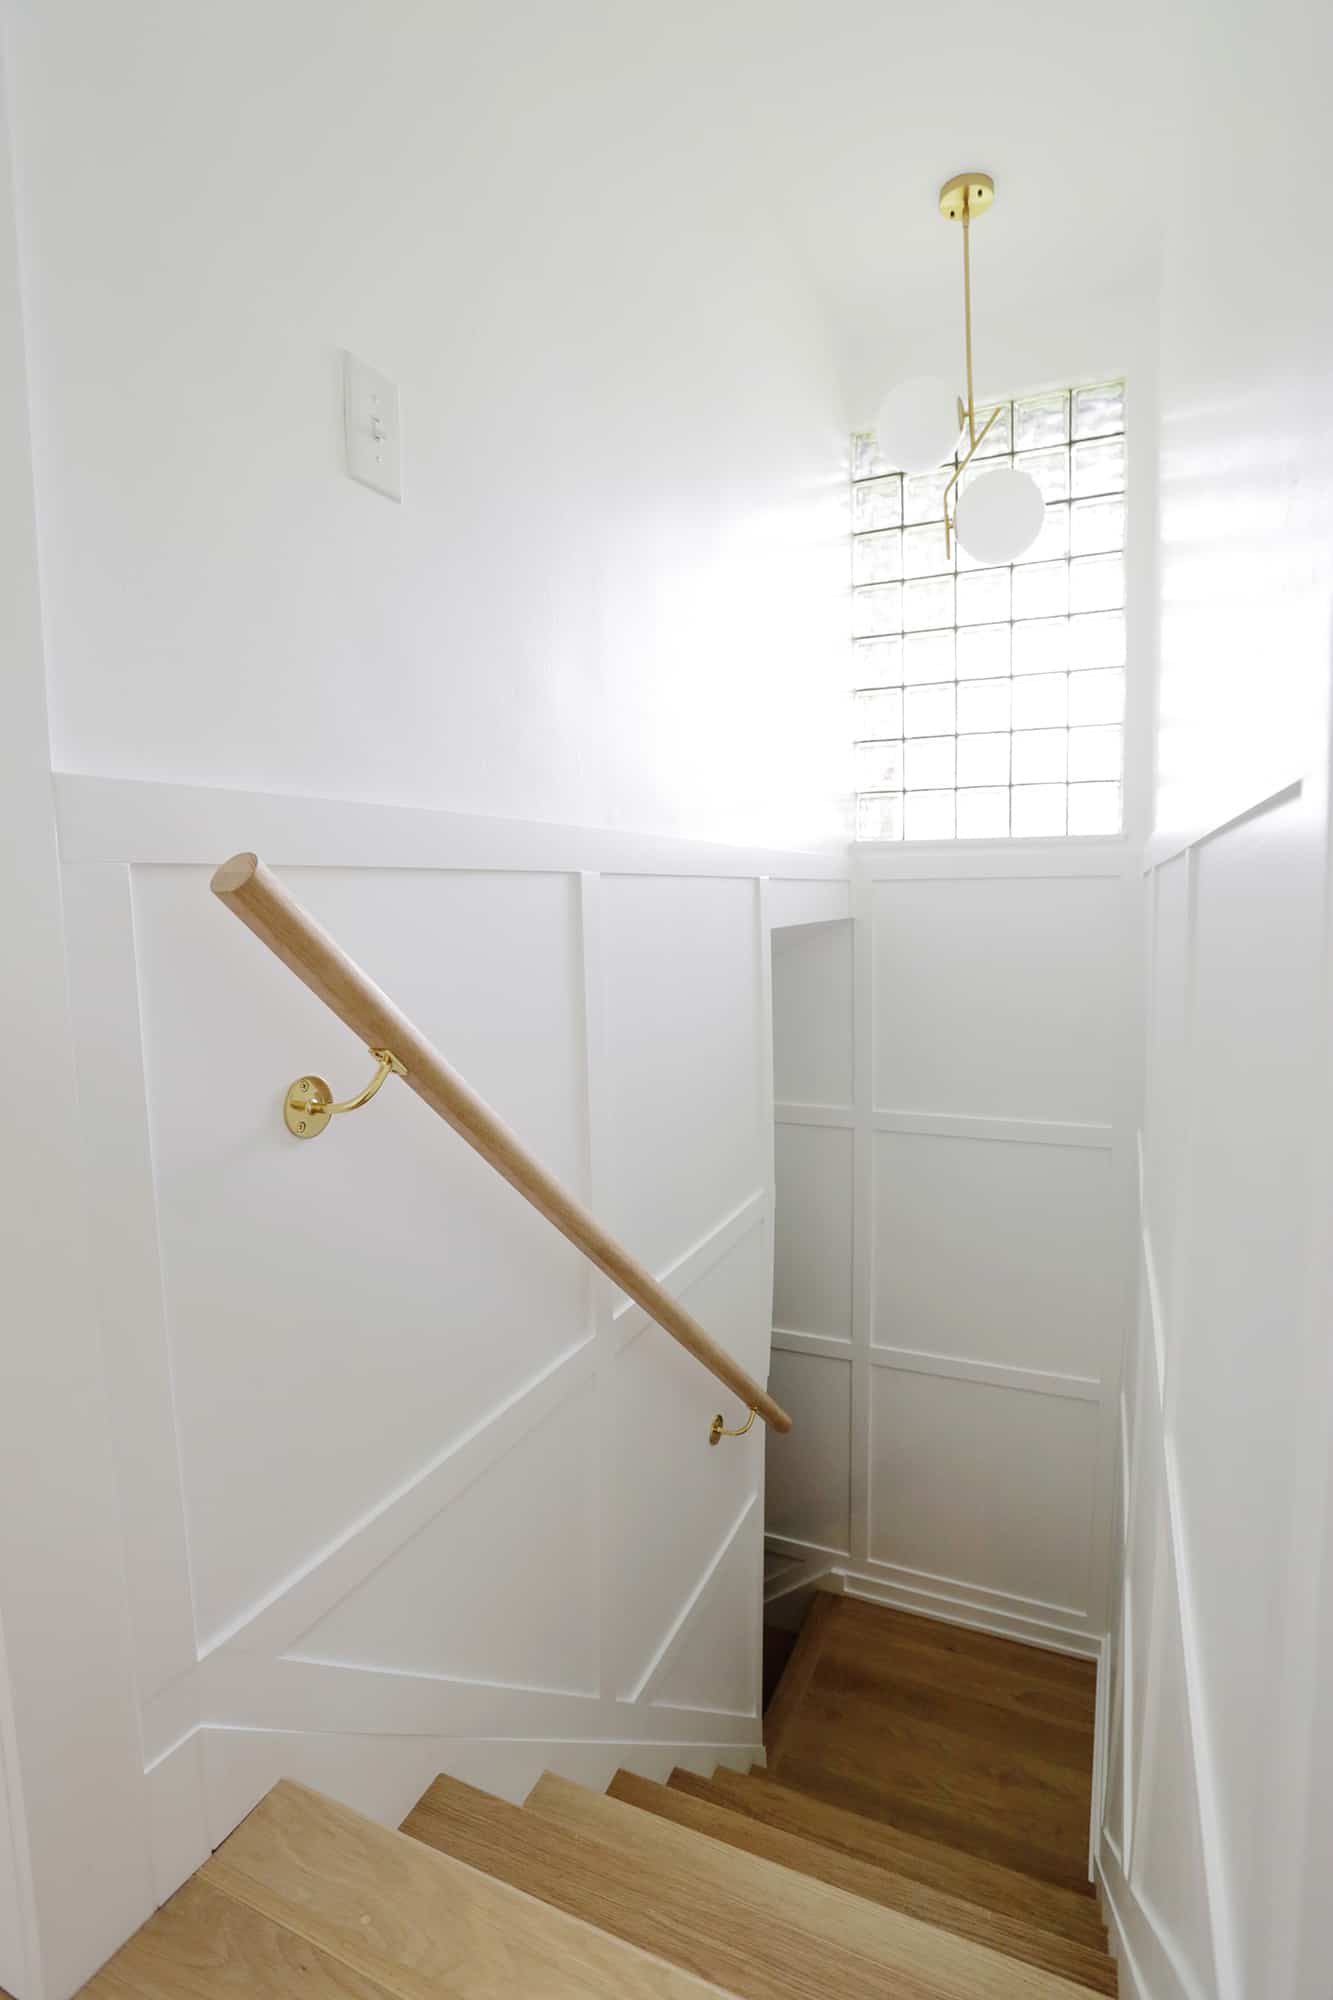
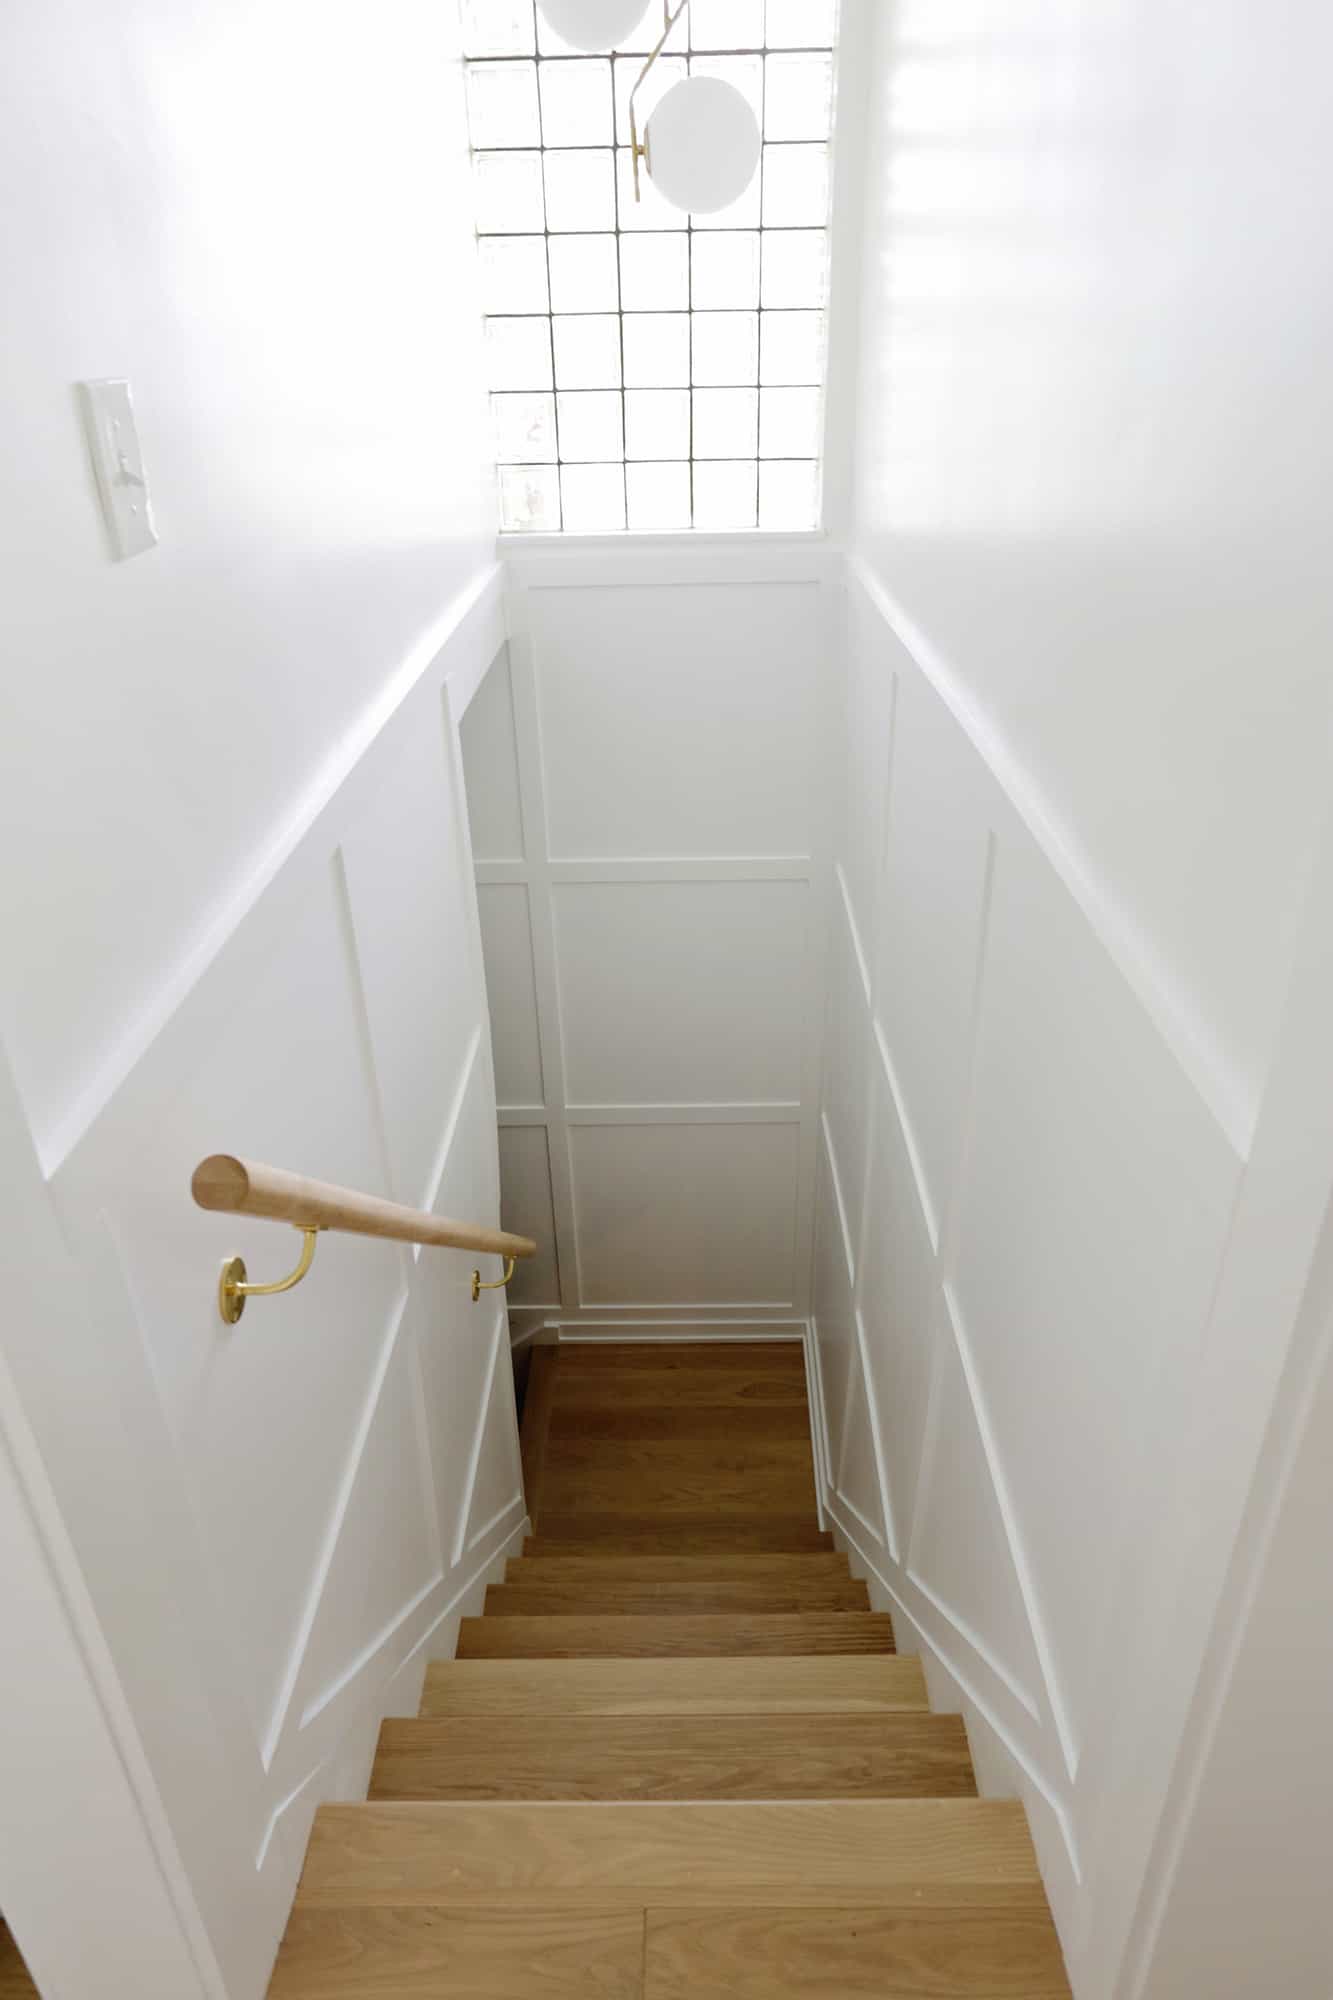 How amazing is that?! Let me tell you, this took me almost a full week of work since I was doing it pretty much all by myself. So it was quite a project, but was totally worth it in the end and all the wood was under $200. And once we put our railing back on, we were fully back in business! I love how polished the stairs look now—it really elevated them quite a bit and it kind of feels like a treat to walk through that area of the house (and I really like the hanging globe light we put above it all). Like I said, these general principles will work on straight areas as well if you are wanting to do a regular wall that’s not angled, but it was kind of nice to learn how to do it on stairs, so doing it on a regular wall will feel like a piece of cake in the future! What do you think, did the board and batten make this staircase so much better?? xo. Laura
How To Do Board And Batten On A Staircase
Instructions
-
First, you’ll want to figure out your grid pattern! I used some painters tape to get an idea of where I wanted the lines to be and that’s really the easiest way to see what size grid you would like.
-
Once the top board was in, I set about cutting my 1/4″ boards to line the bottom of my stairwell area. You can see that it’s a lot of angle finding on the bottom of the stair area, so what I would do is hold boards in place basically drawing with a pencil where it looked like the angles should be, and then I would take the board to my miter saw and move the blade angle until it matched the line of my pencil drawing (you can line it up with the side of the opening for an easy way to tell if you have the right angle).
-
Use a nail gun (I’m in love with our battery powered one but you can also rent them!) to attach the boards to the wall as you get them cut to the right angle and length, and I would give the cut edges a little sanding before attaching to sand off the little fuzzy edges from the saw.
-
Once you get all your bottom boards in (yay!), you can start on the vertical boards! Measure, cut, and attach with your nail gun all your vertical boards, finding any angles the way we did with the bottom boards (i.e., hold it up to the angle, guess the angle with a pencil line, cut and see if the angle fits, recut a little more if needed).
-
Corners are generally two vertical boards coming together to meet in the corner, and if your corners aren’t a perfect 45° you may need to attach one board as close to the corner as you can (level it to make sure it’s straight) and then scribe the side that will fit in the corner of the second vertical board with a jigsaw to fit perfectly against that first board.
-
Once the vertical boards are in, it’s time for the horizontal ones! These go the fastest as you have some angles to find, but a lot of them are between columns so they are just straight cuts and a lot faster (you can just measure the space between the vertical boards and cut to fit).
-
Fill the nail holes and gaps where board joints meet together with wood filler to smooth out all the joints. A little tip for less sanding is to let the filler set a bit and then gently go over it with a damp cloth—it will smooth out the filler and wipe away excess so you have less sanding to do later.
-
Once the filler is dry, sand it down smooth (I like this grit for sanding and this for a final coat to smooth it). Then using this caulk, caulk all around the squares between the boards and the drywall to make it look integrated and not separate from the wall. Just cut the tip at an angle with a small opening, use a thin bead of it, and smooth it out with a damp finger or cloth. It’s a bit time consuming to do, but it makes a HUGE difference.
-
Once your filling and caulking is complete, it’s time to paint! I love this brush for painting angled trim like this and then this roller for painting the insides of the squares and the flat faces of the trim for a smooth look. It’s up to you what paint to use, but I would suggest a satin finish as it’s more of a wall than trim and generally you use satin on a wall and semi-gloss on trim (eggshell could work but the whole thing in semi-gloss could look too shiny).



 The 15-Minute Movement Habit -Simple Desk Exercises for Working Bloggers
  How To Become A More Mindful Person
  How To Beat Loneliness In London
  Free green spaces to enjoy just outside of London
  How To Store Bicycles In Self Storage
  Why 2026’s top bloggers are going back to paper planners to spark creativity
  Why exercise doesn’t have to mean pain
  5 Tips on How to Train Your Brain